

Fenchurch Street was the first SimSig simulation ever developed. The software framework was still being created and development went down some blind alleys. The source of the simulation has been lost, but a few copies of the executable survived.
I have spent some time reverse-engineering this executable to recreate the data for the simulation. And so we have SimSig Fenchurch Street Reborn!
As discussed below, this simulation recreates the original as far as possible. In particular, the data is as it was in the original with no changes. However, the data and core code have been brought up to the latest standards and features (e.g. the provision of sticky notes).
SimSig is for personal entertainment use only and must not be used for any commercial use, including the training of signallers etc.
SimSig is protected by copyright. No SimSig file may be distribution by any other website, by CD ROM or other media without express written permission from Cajon Rail LLC.
This software and is offered as-is, "what-you-see-is-what-you-get". Errors, omissions, faults or other problems are not covered by any warranty of any kind. Problem reports may be emailed or posted on the forums but action may or may not be taken by the authors, a decision which is up to said authors. SimSig accept no responsibility for any damage that may be caused to computer systems by the software.
My thanks to Geoff for the original simulation and allowing me to do this, to Ben Woodward for the 2009 timetable, and to all my testers for their hard work.
SimSig Fenchurch Street basically covers the area of one of the workstations at Upminster SCC. It covers the LTSR, or "Thameside" line, from Fenchurch Street to Upminster and Ripple Lane yard, plus connections to Bow Junction and Woodgrange Park (these are the only remaining links between this line and the rest of the "classic" network, though Ripple Lane also connects to HS1).
The Up direction is leftwards and the Down direction rightwards.
In the default mode, the diagram consists of two parts, one above the other.
Upper section: This consists of the line from Fenchurch Street to East Ham EMUD, with the single track branch at Gas Factory Junction towards Bow Junction. As can be seen, there are four tracks for a short distance out of Fenchurch Street, allowing trains to be reordered on arrival or departure. There is also a goods loop at Gas Factory Junction.
Lower Section: This is based around Barking station. This is where the LTSR route splits - both branches head for Southend and Shoeburyness, but one runs directly via Upminster, while the other diverts along the north bank of the Thames to Tilbury before turning north to meet the first at Pitsea. The latter branch sees a lot of goods traffic from the various docks. The Upminster branch is bidirectional from just west of Barking all the way to Shoeburyness, though this is only simulated as far as Dagenham East.
There is also a connection to the other lines around London via Woodgrange Park, and this is also one terminus of the London Overground "GOBLIN" service.
The basic speed limits are 20 mph at Fenchurch Street, then 40 mph to Limehouse, a short break back to 20 again, then 50 mph to Gas Factory Junction, 60 mph to East Ham, 45 mph through Barking, and 70 mph from Barking to Upminster.
The standard 25kV overhead equipment powers all lines in the simulation except platform 1 at Barking.
All the scenarios and options have been added in this version; there were no such in the original simulation.
The four scenarios and the four levels of problem are all self-evident. "Normal"/"None" corresponds to what players of the original simulation would have experienced. ARS was provided in the original simulation and has not been changed.
The tick boxes in the options have the following effects. If all the boxes are left unticked you will have as close as possible to the original simulation, warts and all.
Any of the fringe locations can be told that the line is blocked by putting a special code into the relevant train describer berth:
There are two timetables supplied with the simulation. Firstly, the "morning" timetable is that provided with the original simulation, with some minor bug fixes, and represents a weekday morning service (plus, for no known reason, one afternoon goods service) at the time the original was written. Secondly, Ben Woodward has provided a 2009 timetable.
The following description is of the "morning" timetable. There are a total of 218 schedules in the timetable involving 130 trains entering the simulation and one divide. The entry points are:
| East Ham EMUD | 10 |
| Woodgrange Park | 32 |
| Upminster | 55 |
| Ripple Lane | 4 |
| Dagenham Dock | 29 |
Standard railway descriptions (headcodes) are used in SimSig, as always. The first digit is the class of train. The second character is a letter, which usually denotes the route taken by the train. The remaining two digits simply give each train its own identity.
The train classes are:
| 1 | Express Passenger Train |
| 2 | Local Passenger Train |
| 3 | Priority Empty Coaching Stock (not used in this timetable) |
| 4 | Freight Train (75mph) |
| 5 | Ordinary Empty Coaching Stock |
| 6 | Freight Train (60mph) |
| 7 | Freight Train (40mph to 45mph) |
| 8 | Freight Train (35mph or less) (not used in this timetable) |
| 9 | International Services (not used in this timetable) |
| 0 | Light Locomotive |
The route letters found in the timetable are as follows. They are only a guide; always check the actual destination of the train.
| A | Not used |
| B | Passenger services via Upminster |
| C | Not used |
| D | Passenger services via Upminster |
| E | Trains to Eastern Region outside East Anglia, trains from other Regions, and ECS to East Ham EMUD |
| F | Not used |
| G | Not used |
| H | Used on one light engine; meaning unknown |
| I | Not used |
| J | GOBLIN services |
| K | Not used |
| L | Trains to or from elsewhere in East Anglia |
| M | Trains to London Midland Region |
| N | Not used |
| O | Trains to Southern Region |
| P | Not used |
| Q | Conditional workings (not used) |
| R | Passenger services via Dagenham Dock |
| S | Trains to Scottish Region and ECS to Shoeburyness sidings |
| T | Not used |
| U | Not used |
| V | Trains to Western Region |
| W | Not used |
| X | Out-of-gauge trains (not used) |
| Y | Not used |
| Z | Special trains (not used) |
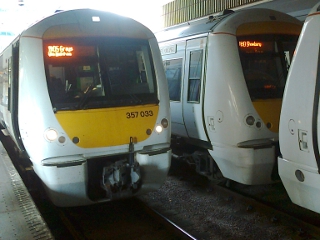
The "c2c" service runs between Fenchurch Street and Shoeburyness via either Upminster or Dagenham Dock. In the peaks there are fast services that omit some of the stations. Empty stock works in and out of the depot at East Ham. One or two services per day run to or from Liverpool Street instead, using the Woodgrange Park route. The trains are all class 357 "Electrostar" 4-car EMUs, usually coupled into 8- or 12-car formation.
The "GOBLIN" service runs between Gospel Oak and Barking, using platform 1 at the latter. It is operated by DMUs.
There are normally a lot of freight services between Ripple Lane and the Woodgrange Park route, but the rest of the line sees little or no freight.
This section lists the internal codes (which in many cases are TIPLOC codes) for the timetable locations in the simulation, and also provides a brief description of the less-obvious locations. These codes are used when using the timetable converter.
When a train enters the simulation a different code - an entry point code - is used. These codes are shown in italics following a » symbol. In general, the entry location should not be the first location in the train's timetable as well.
| FENCHRS | Fenchurch Street | |
| CRISTSJ | Christian Street Junction - signals 107, 112, and 511 | |
| LIMHSE | Limehouse | |
| GASFCTJ | Gas Factory Junction - signals 129, 130 (both "ML") and 518 ("BJL") | |
| GASFLP | Gas Factory Loop | |
| BOWJ | Bow Junction » EUPGAS | |
| WHAMHL | West Ham High Level | |
| EHMEMUD | East Ham EMUD » EHAMUP (signal 900), EHAMDN (signal 1019) | |
| WDGRNPK | Woodgrange Park » EDNWOOD | |
| BARKING | Barking | |
| BARKUPJ | Upney Junction - signals 173 & 532 ("DL"), 176 & 529 ("UL"), and 910 & 915 ("UCL") | |
| DAGNHME | Dagenham East - signals 193, 194, and 533 | |
| UPMNSTR | Upminster - signals 212 and platform 2 » EUPMAIN (signal 214) | |
| RPLLFLT | Ripple Lane Arr - actually immediately in advance of signal 617 » EUPRIPL (signal 804) | In practice, these two can be used interchangeable for down trains |
| DGNHMDC | Dagenham Dock - actually immediately in advance of signal 617 » EUPTILB (signal 628) | |
| RPLLRRJ | Renwick Rd Jn - signal 620 | |
There are no known problems in this release.
This section will be updated as bugs are reported.
The following are part of the original simulation data. Even where they are not prototypical, they have been retained in the interests of reproducing the original simulation as much as possible. They are not bugs and will not be fixed.
A brief description of the various "splash screen" photographs.
|
|
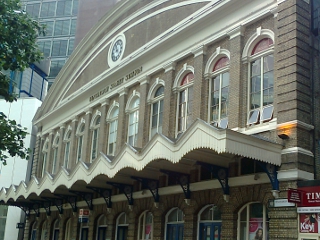
The frontage of Fenchurch Street station. It's not obvious from here that the platforms are on the first floor. |
|
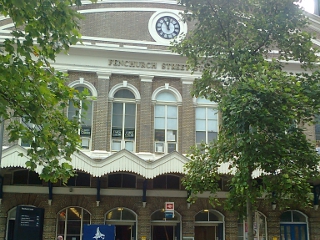
Another view of the frontage, through the park that has replaced the forecourt. |
|
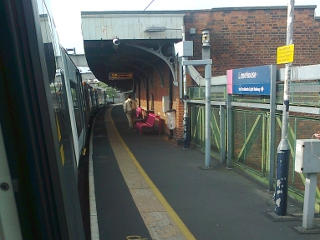
Fenchurch Street platform 1 on the right. On the left can be seen the short platform that, in the days of slam-door 302s and 308s, was used by commuters in the morning rush hour to jump the queues. |
|
|
A Fenchurch Street to Shoeburyness via Basildon service waits in platform 3. |
|
The same service continues to wait, while a shorter train to Grays via Rainham is about to depart from platform 2. |
|
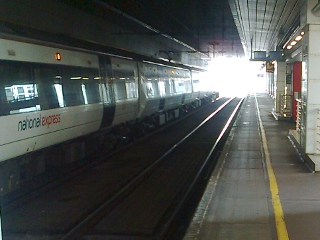
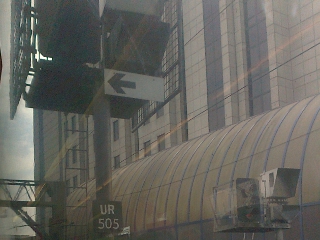
UR505 and UR507 at Fenchurch Street, with the stairs and escalators up to Tower Gateway DLR station in the background. |
|
|
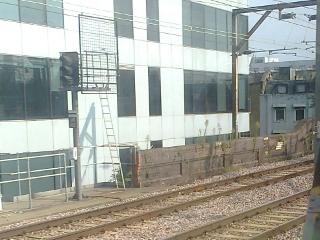
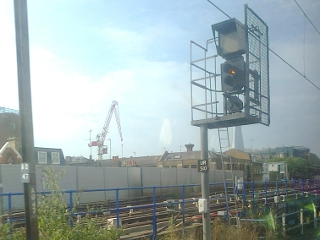
The eastern of the two scissors crossovers on the fast lines outside Fenchurch Street. |
|
UR105 |
|
UR510 on the Up Slow at single yellow (but no readable platform number), with Royal Mint Street Jn on the DLR in the background. |
|
|
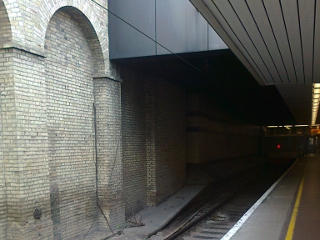
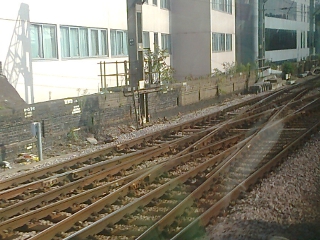
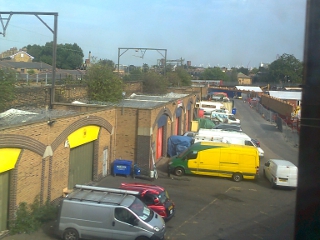
The former link to Heydon Square goods depot (LNWR). Another such link, to the GER's Goodman's Yard depot, can be seen on the north side opposite the central scissors crossover outside Fenchurch Street. Three other yards were on the south side of the line. |
|
UR116, while a westbound DLR train stands at Shadwell station. |
|
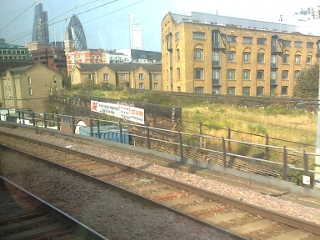
A Grays via Rainham service stands in the down platform at Limehouse. The curve is because this is where the Stratford branch diverged from the original London and Blackwall Railway route. |
|
|
Looking backwards at Limehouse. |
|
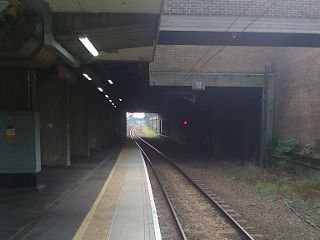
Gas Factory Junction. The route towards Bow Junction used to be double track. |
|
The Bow Junction route heads away; more precisely, the LTSR "short cut" to Barking (now the main line) branches off the branch to Bow Junction and Stratford. |
|
|
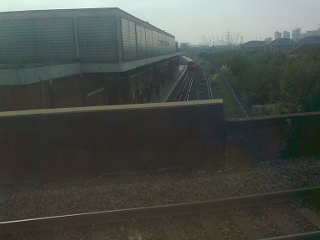
West Ham, looking down at the eastbound Central Line. |
|
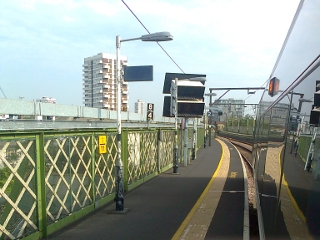
The Down platform at West Ham High Level. |
|
East Ham EMU Depot, with the Up line visible on the right. The Down line is actually 4 chains (80 metres) longer than the posted mileage (and the Underground is 5 chains longer) because it has to go round the depot, a discrepency that isn't simulated. |
|
|
The main shed at East Ham EMU Depot. |
|
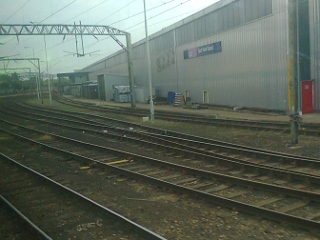
Some of the storage sidings on the north side of East Ham EMUD. |
|
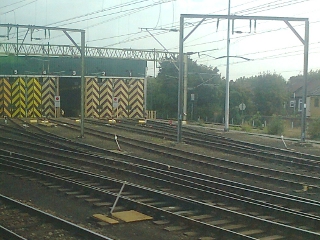
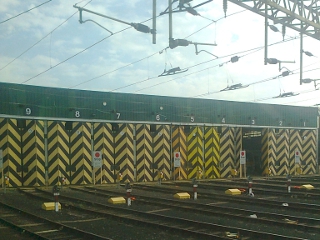
Platform 7 at Barking, with UR611 cleared for the service to Grays via Rainham. In the distance can just be seen the diveunder used by approaching westbound District Line trains. |
|
|
Platform 8 at Barking; UR909 is rarely cleared because it's only used for wrong-direction working. |
|
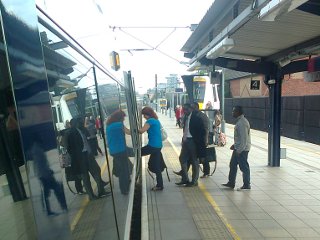
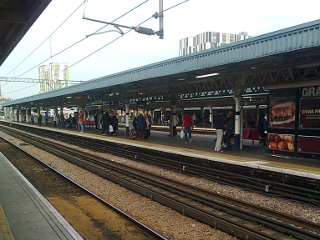
Looking across from platform 7 to platform 6 at Barking, used by the westbound District Line. The arrangement here gives cross-plaform interchange for morning commuters from Southend-on-Sea and Basildon. |
|
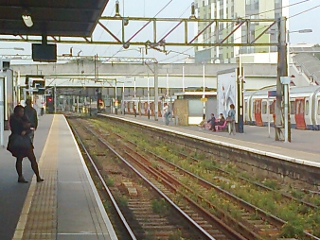
Platforms 4 and 5 at Barking. UR525 on the latter is another signal that's rarely cleared. To its left, UR167 is being left red by the ARS until a down service approaches. |
|
|
Platforms 4 and 5 at Barking again, this time looking towards Fenchurch Street so 4 is on the right. It looks like the Down line could do with some vegetation clearance. |
|
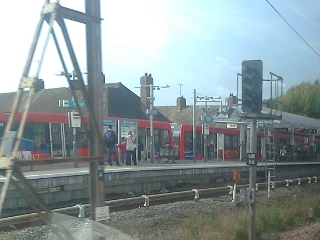
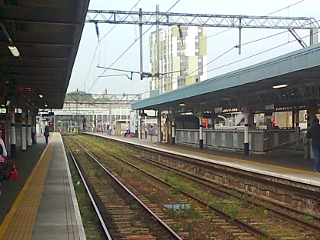
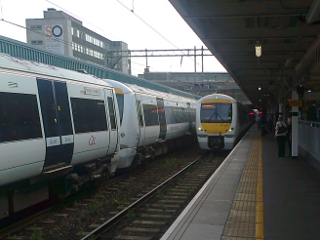
The same platforms, but with a Hammersmith & City Line S7 train in platform 3 (the bay platform). In the distance it is just about possible to see an approaching GOBLIN service. |
|
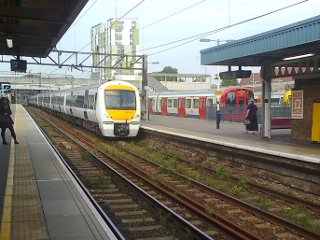
The hat-trick at Barking: a down Shoeburyness in platform 4, a Hammersmith & City Line S3 in platform 3, and a GOBLIN in platform 1. |
|
|
Passing trains on the via-Upminster platforms (4 and 5) at Barking. |
|
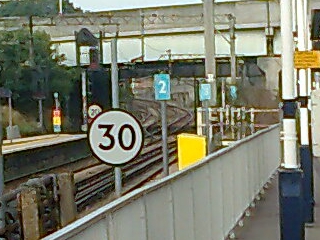
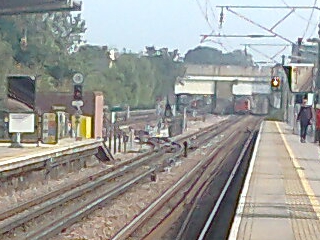
UR908 with, just behind, the lines to Woodgrange Park starting to climb up the flyover. The "30" sign and the blue number signs are for the westbound District Line, which will pass under that flyover before taking its own one over the Fenchurch Street lines. |
|
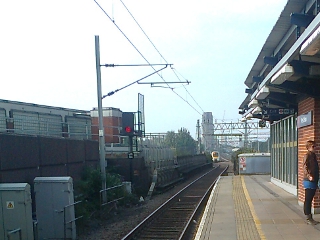
West Ham High Level looking towards Barking, with a train to Fenchurch Street on the far right. UR141 is red behind the Down service whose passengers are still walking along the platform. |
|
|
West Ham High Level looking towards Barking again. UR141 has now cleared to yellow, and in the distance a westbound Underground train approaches from Plaistow (if you look carefully, you can also see an eastbound one beyond the bridge). |
|
West Ham High Level looking towards Gas Factory Junction, with UR140 red behind the departing train to Fenchurch Street. |