On Sunday 10th August a party of visitors were given a tour around Wood Lane
depot, closed station, and control centre. These are my photographs from the
tour.
Each thumbnail is a link to the corresponding image. The images were mostly
taken at 2000x1500 resolution but have been shrunk to about 800 by 600. If the
image filename ends in "e" it has been further edited (e.g. cropped or
the contrast changed); in two cases there is also an "a" suffix for a
close-up of part of the original picture at the original scale. The original
images are also available in a
Fotopic
gallery.
For those with the appropriate tools, information about the camera settings
can be found within the JPEG files. The numbers within the filename are the
sequence number of the photo - missing numbers are photos which I didn't think
worth including.
 |
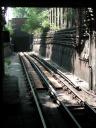
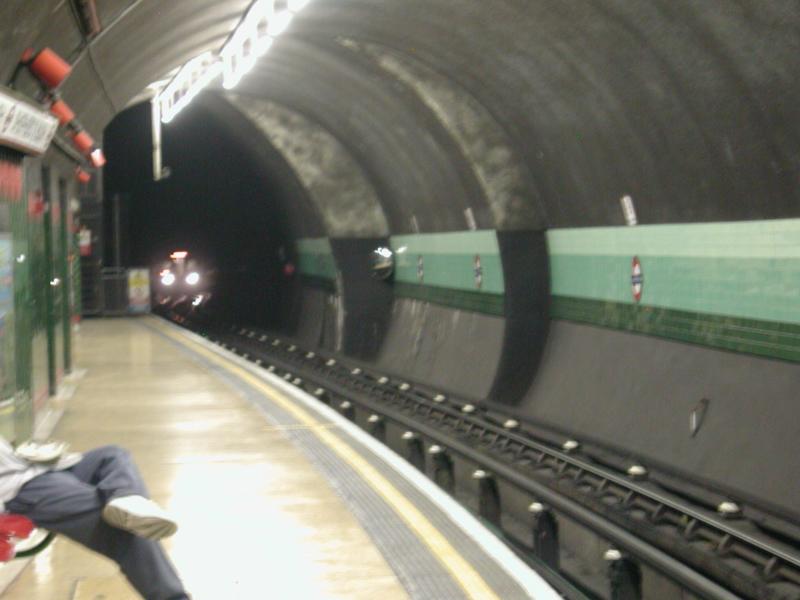
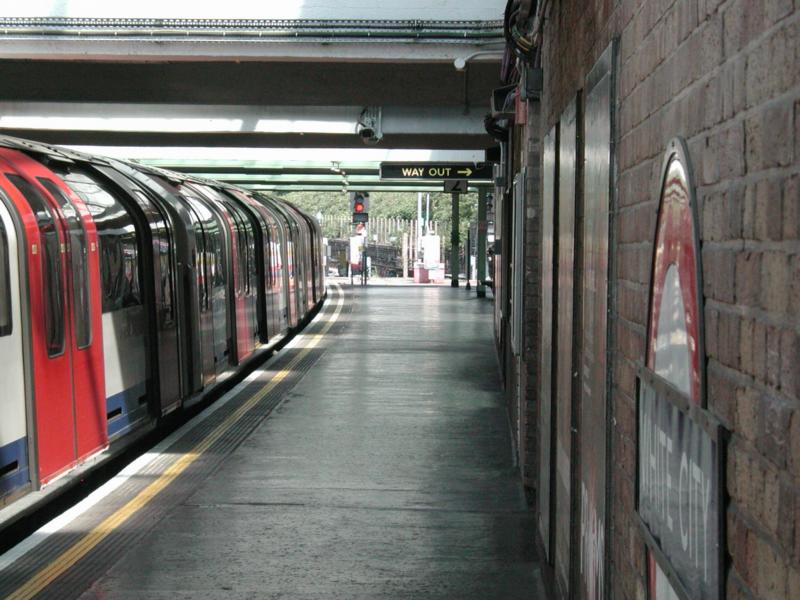
Looking along the eastbound platform at White City (at this
location trains are running on the right-hand track). Directly ahead we can see
the tunnel mouth leading to Wood Lane and the tunnel lights switched on in the
station. The track diverging to the left heads to Wood Lane depot; we'll see it
again later. |

|
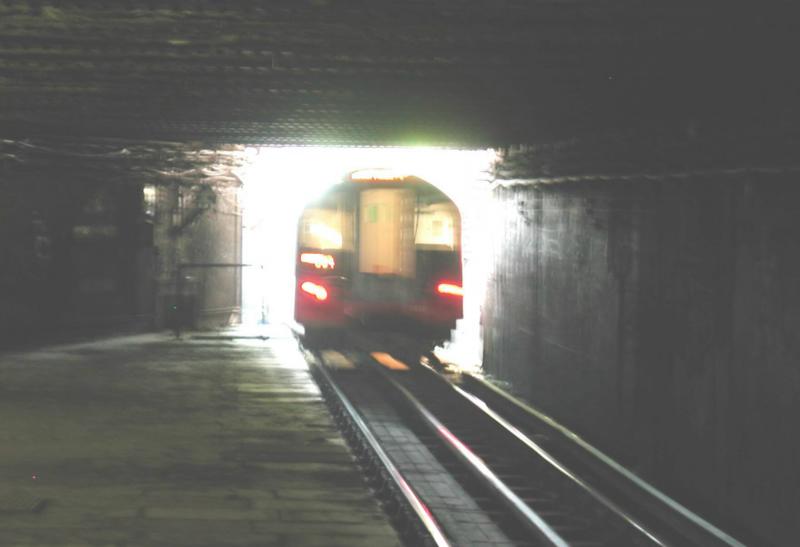
We all got in the front carriage of a service train which
proceeded normally before stopping at Wood Lane. We all clambered out through
the driving cab, to the bemusement of other passengers. Here we see our train
departing through a brief burst of sunlight ... |

|
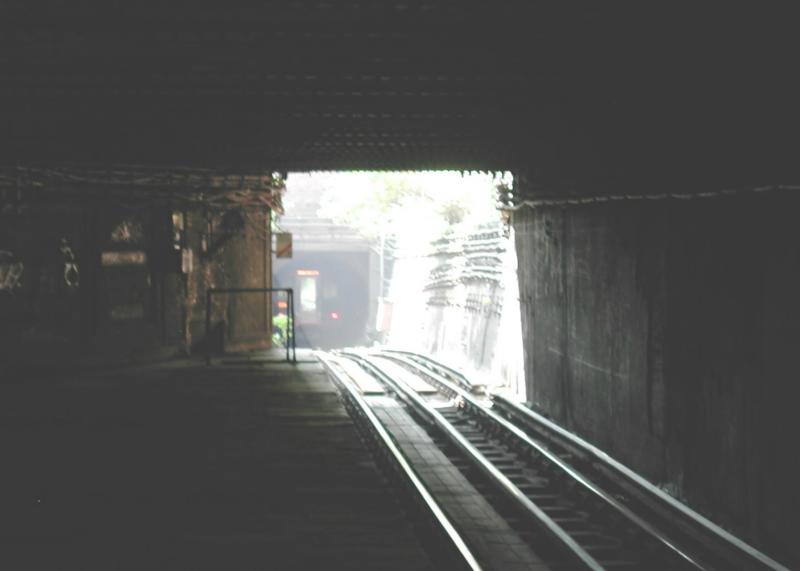
... before descending into the tunnels towards Shepherd's Bush
(eventually surfacing at Stratford). |

|
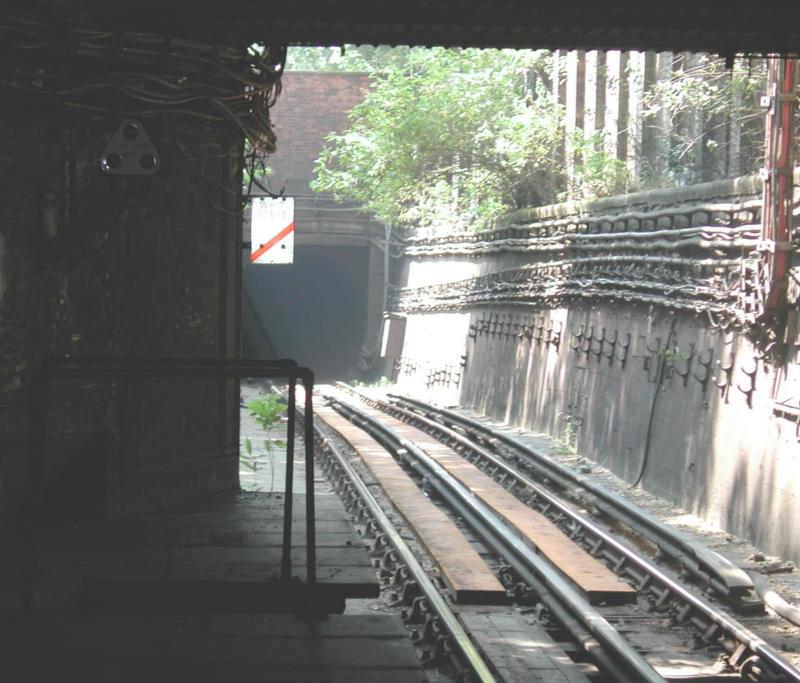
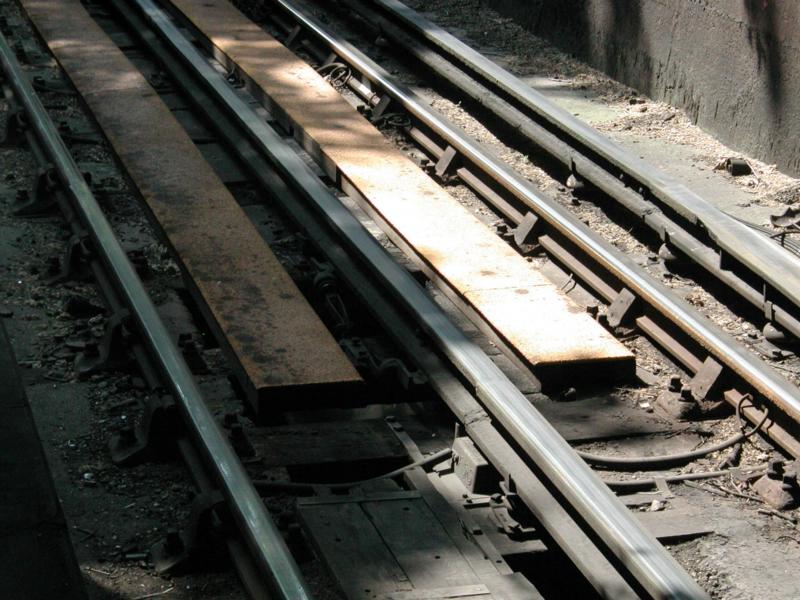
Now it's gone, we get a good view of this section. The white
board with the red stripe is a block marker board, showing the location of an
imaginary signal (that is, one in the signalling system but with no visible
signal head). The Central Line signalling is explained
in an
article on my web site. |

|
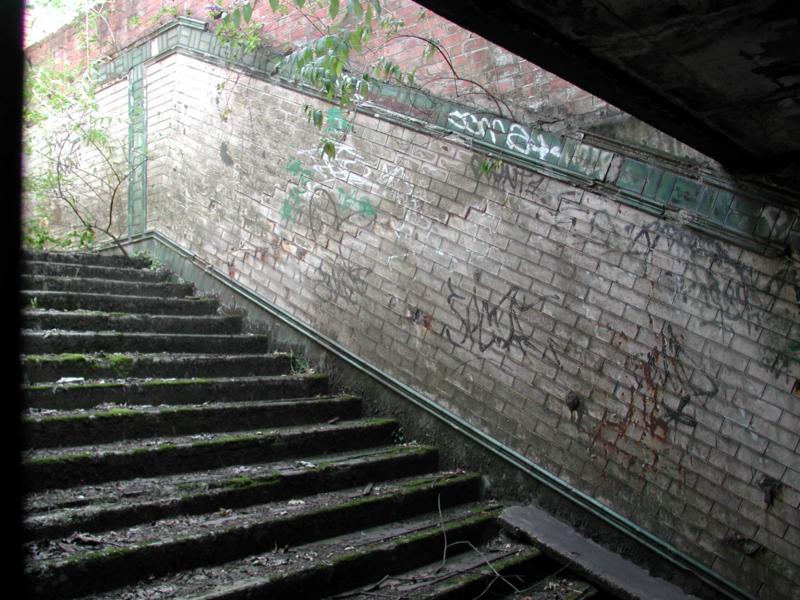
The staircase from the platform up to the surface. It's barred
off at platform level, so I can't say exactly where it comes up. Since we were
trapped there, this sequence of pictures were all taken from the erstwhile
eastbound platform (though trains are heading south at this point) - platform 3. |
 |
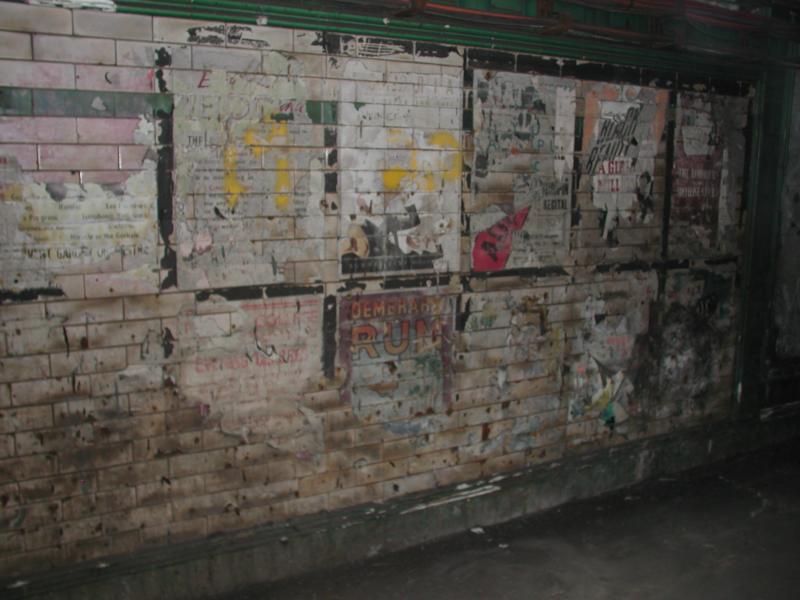
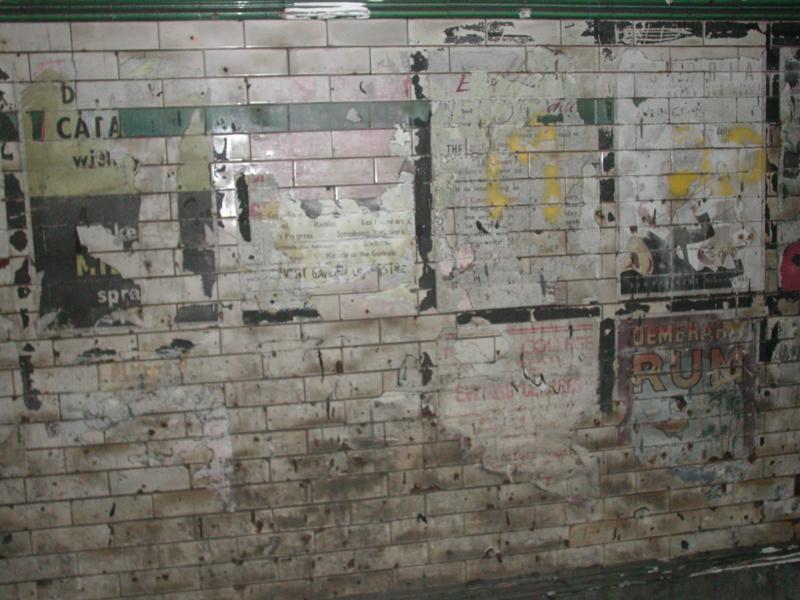
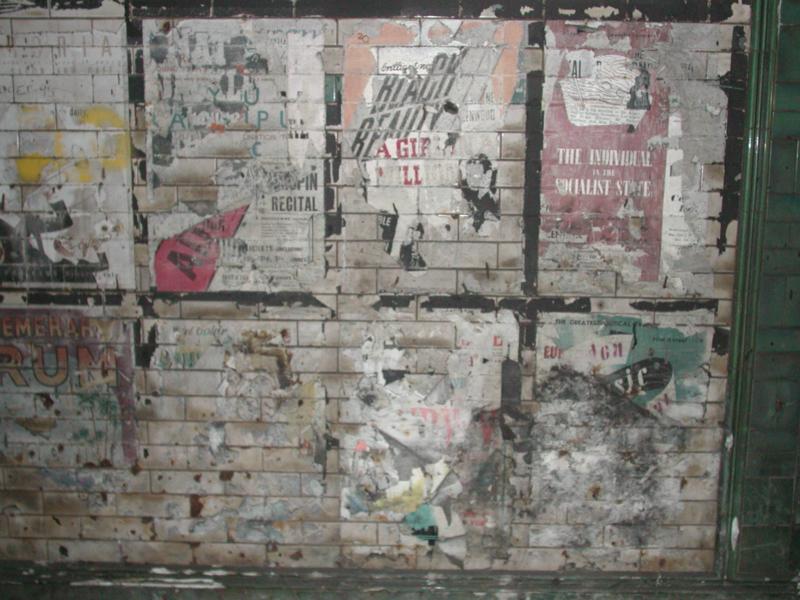
The last day of service at Wood Lane was 22nd November 1947.
While the posters have had over 55 years (and lots of vandalism) to survive,
they can still be seen. An overall view is on the left with closer-up views
below.
|

|
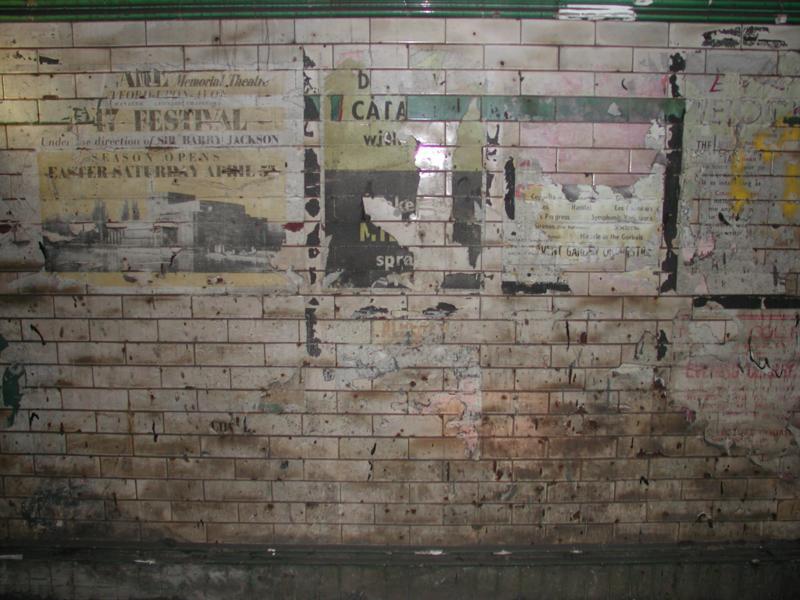
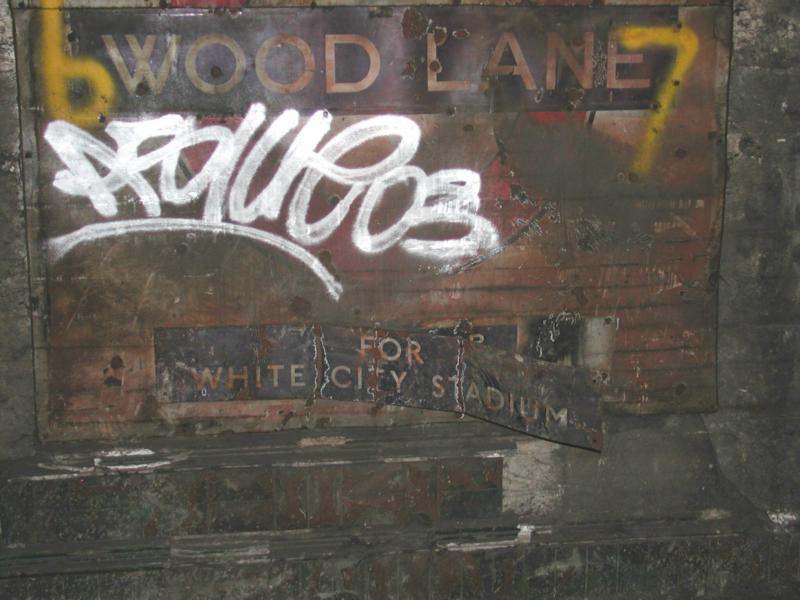
Again the graffiti artists have been at work, but it is still
possible to read this station sign with the footnote for White City Stadium
... |

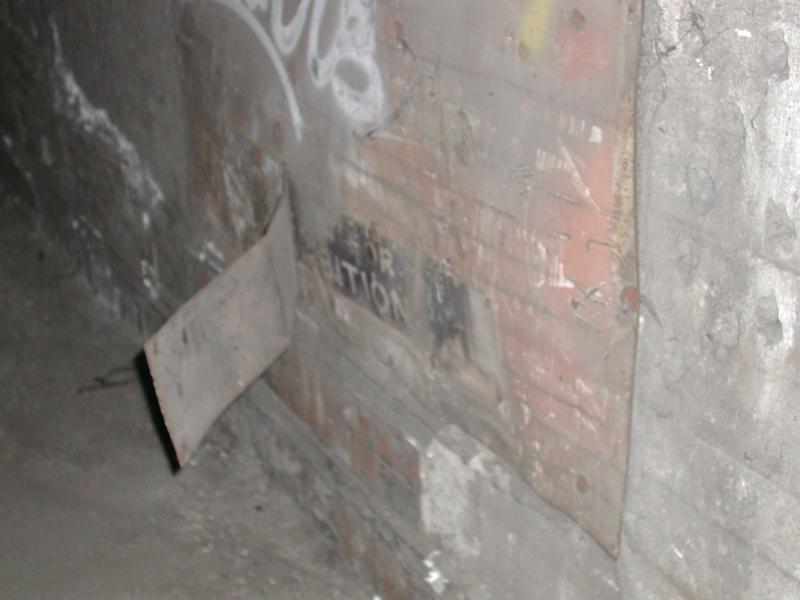
|
... but previously for Exhibition. |

|
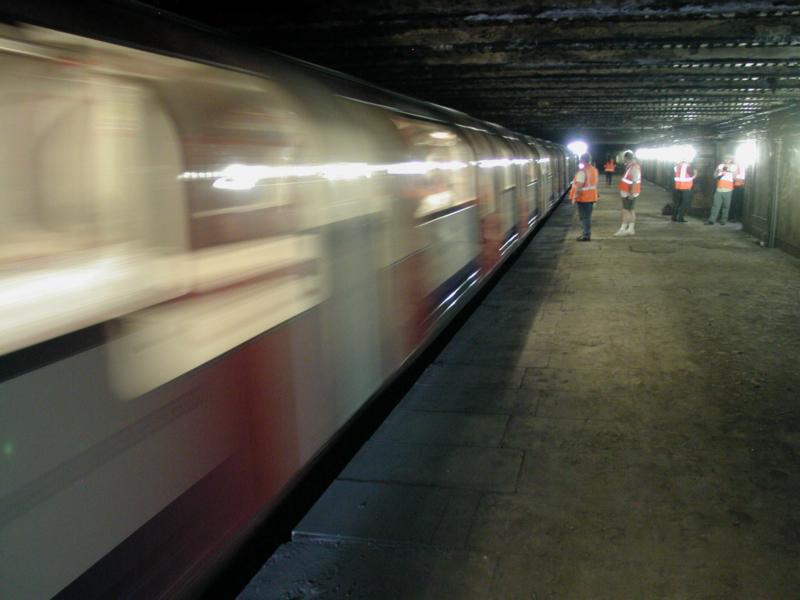
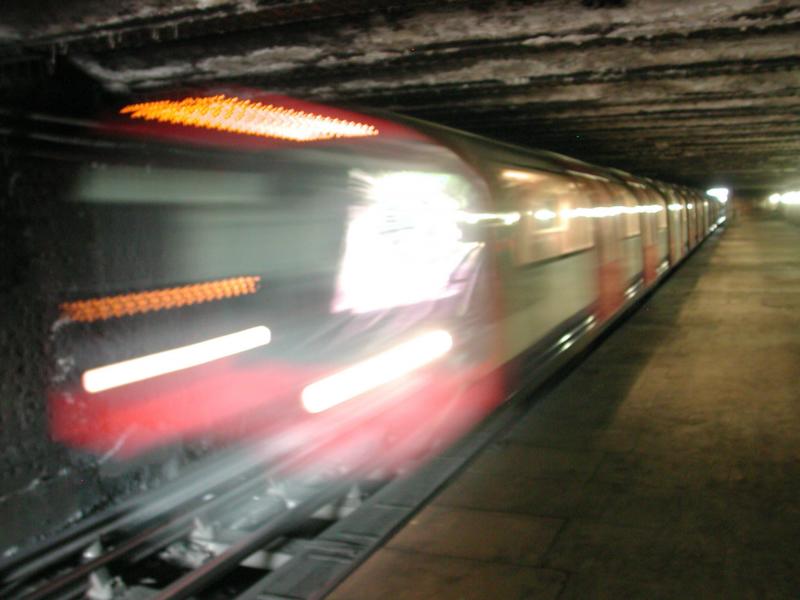
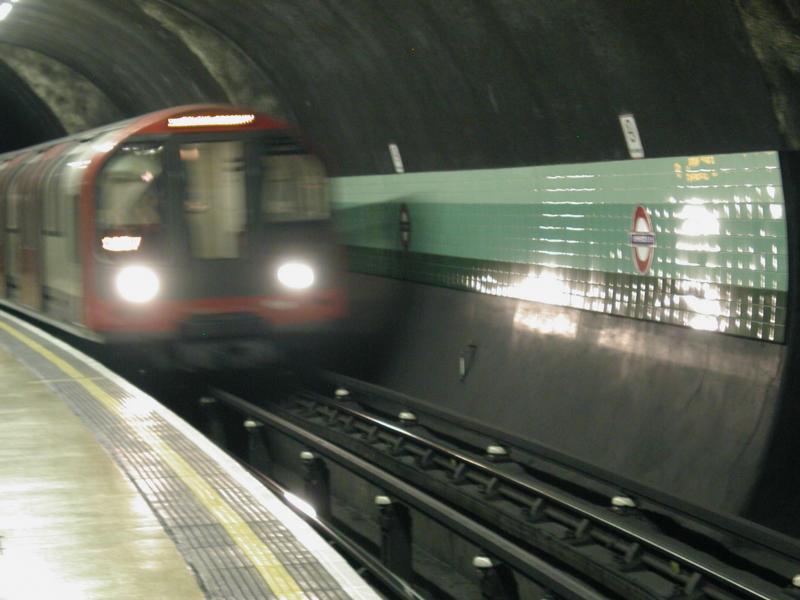
While we were there several trains came through without
stopping. Despite the apparent speed, this train was passing at little more than
walking pace. |

|
As was this one less than two minutes later. Both pictures
have an exposure time of ¼ second, which allows anyone with the energy to
do so to work out the actual speed. |

|
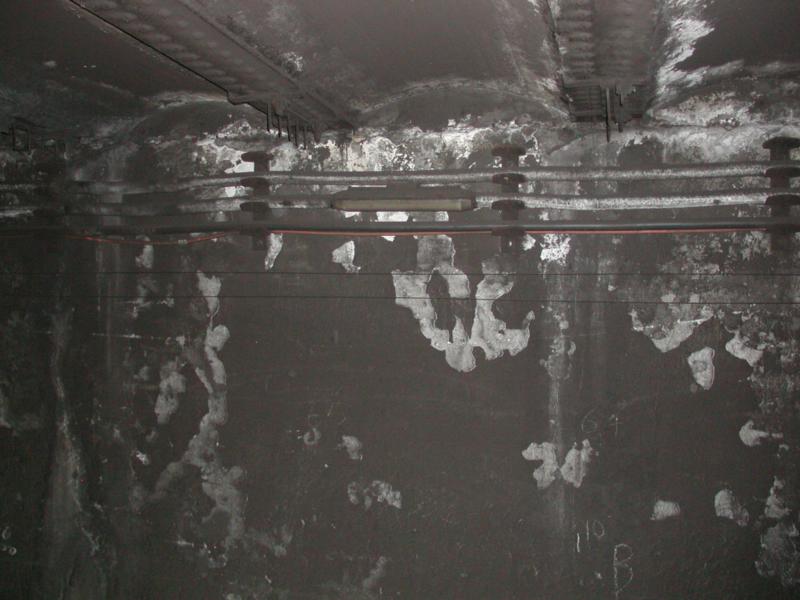
A view across to the tunnel wall. The tunnel telephone wires
are low-tech compared with the modern signalling, but they still work. |
|
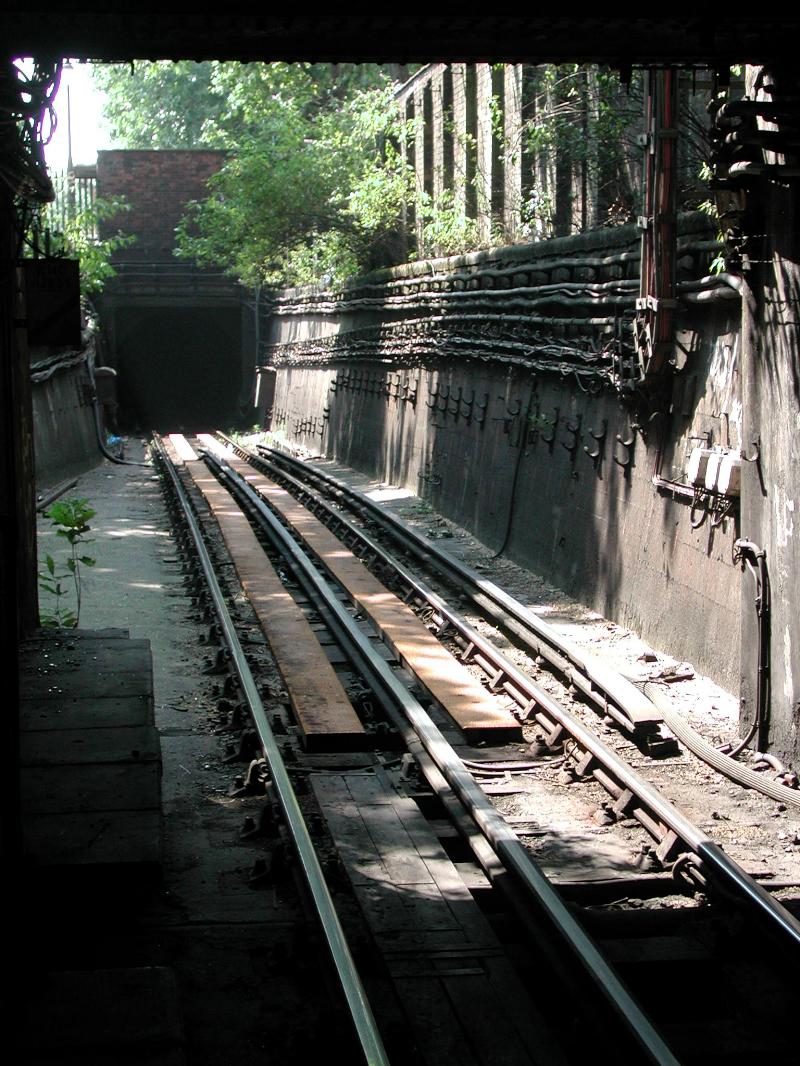
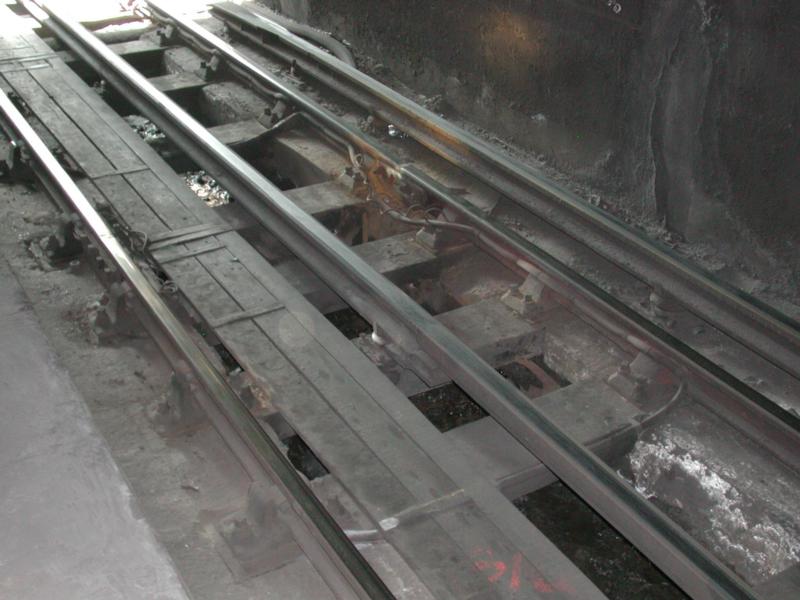
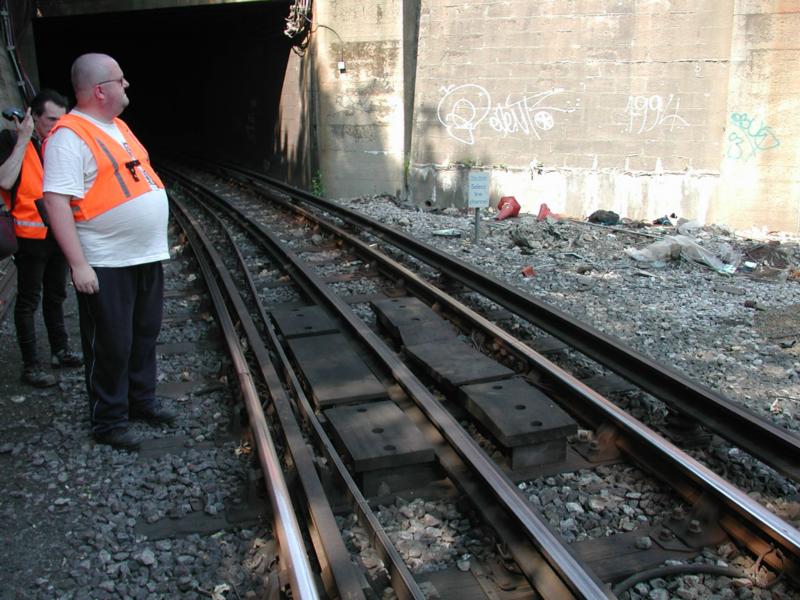
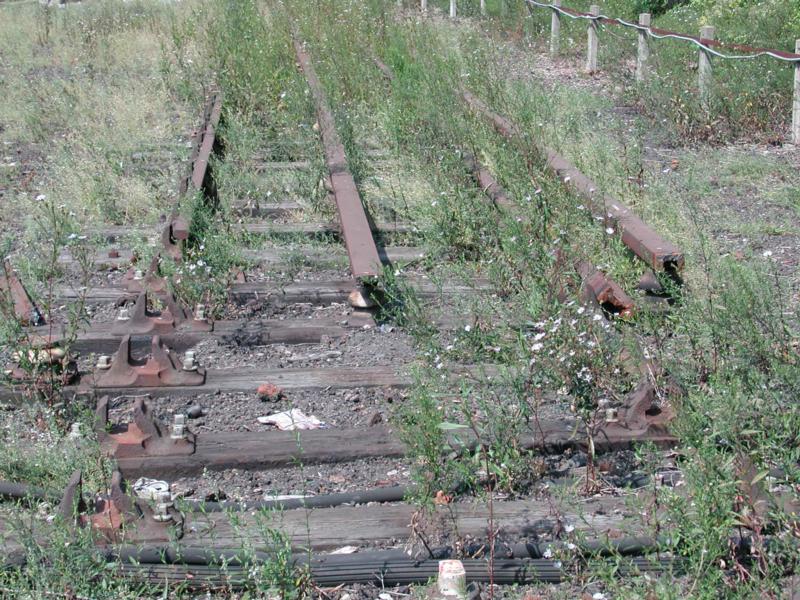
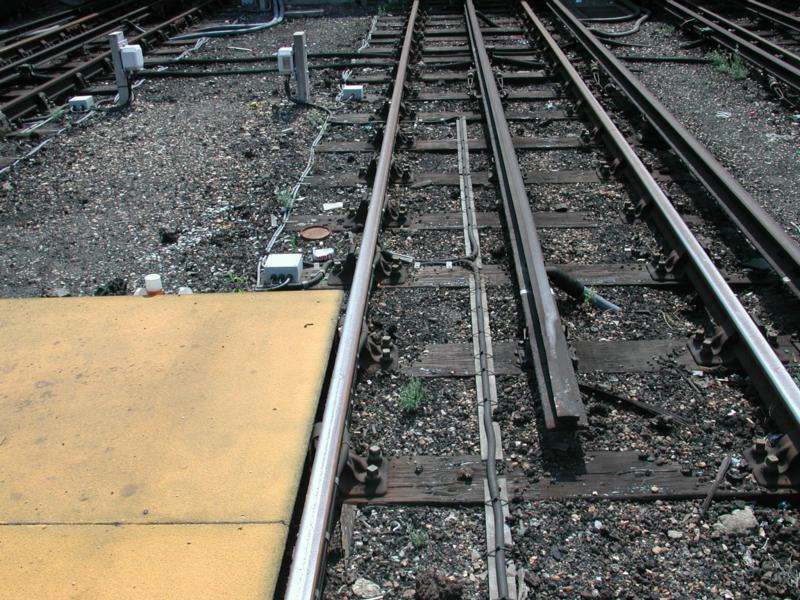
Another view of the last open section on the way to Shepherd's
Bush. I have no explanation at present for the wooden boards either side of the
negative rail. On the left hand side you can just see where the original loop
track converged with the eastbound line from Acton. There is no obvious reason
for the gap in the positive rail, but it would have been opposite the starting
signal that was present before resignalling (and has been replaced by the block
marker board). |

|
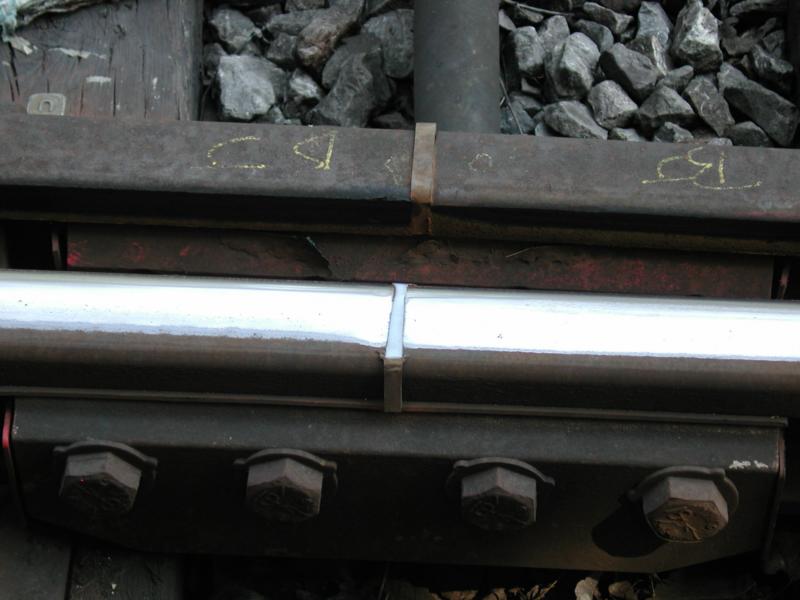
Here is a closeup view of the block joint corresponding to the
block marker board at the south (east) end of the station. The actual insulated
joint is more easily seen in the right hand running rail. Because the signal
receiver on the train is mounted ahead of the front axle, the signal needs to be
available a short distance ahead of the joint. This is done by the thick wire
that can be seen lying next to the running rails. |
 |
An even closer view of an insulated block joint (though not
the same one). |

|
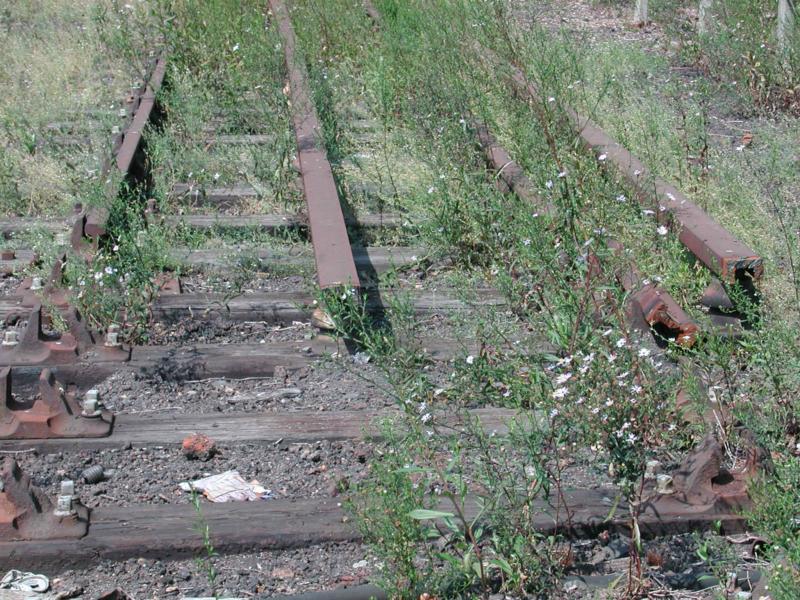
One more look at these boards, but still no obvious reason. |

|
Having finished with the eastbound platform at Wood Lane, we
boarded a train that stopped for us (this time getting in through a normal set
of doors opened using the "butterfly" cock) and rode it to Shepherd's
Bush. We then crossed to the westbound to catch a train back to White City. Here
we see our train approaching and (slightly blurred, due to the 1/6 second
exposure) the new tiling on the station wall. This photograph was taken
without flash; never use flash photography at underground stations or where it
might affect a driver's vision. |

|
Another attempt; the camera managed this with only a 1/10
second exposure, hence the sharper image. |

|
Having returned to White City we got off the train before it
went into the siding. Just visible under the starting signal is the cleared
shunt signal (a white circle with a red diagonal bar). |

|
A view of White City station from the outside, showing the new
glasswork following the Television Centre bombing. The people in hi-visibility
vests are some of the study group. |

|
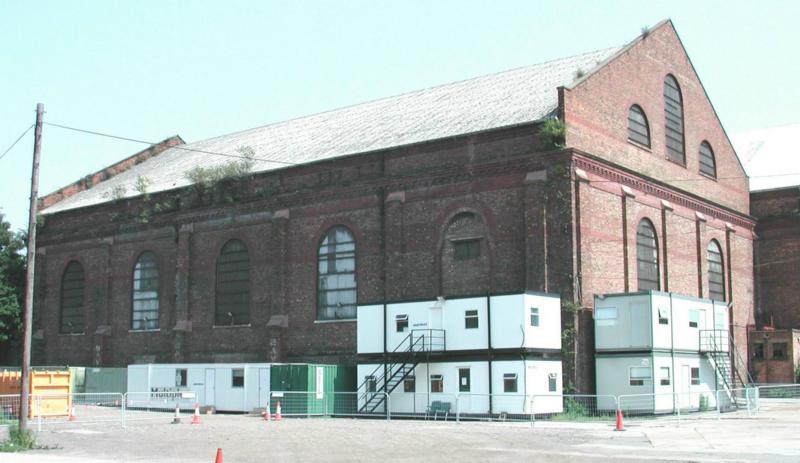
One of the two buildings of the original Central London
Railway power station at Wood Lane; this is the boiler house, partly hidden by
portacabins. |

|
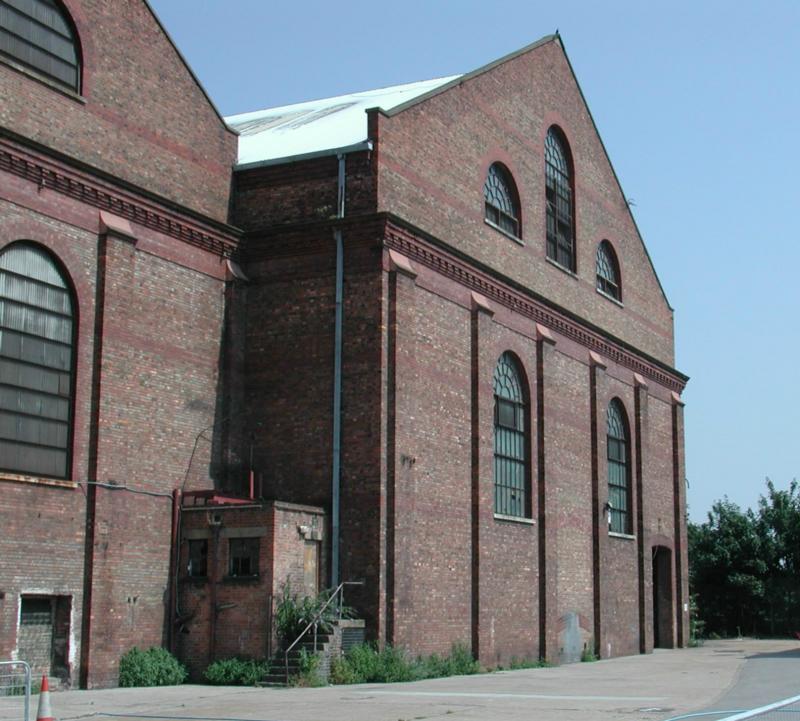
And an end-on view of the boiler house (on the left) and the
power house (on the right). |

|
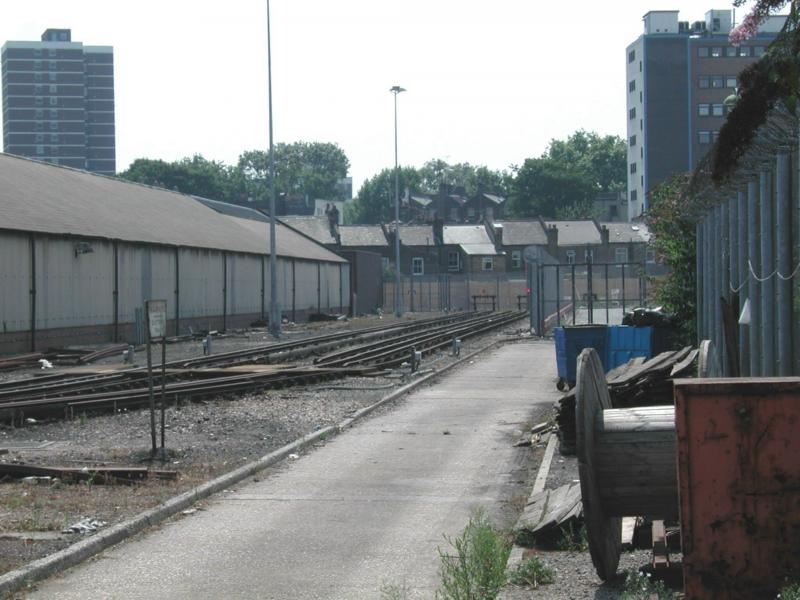
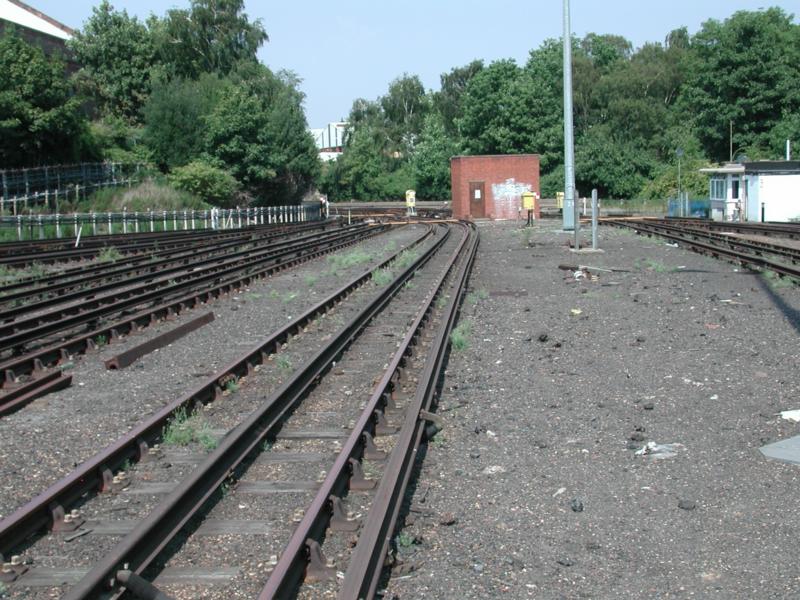
From White City we walked to the Central Line depot (passing
the above buildings on the way). Here we see the western sidings outside the
depot buildings. |

|
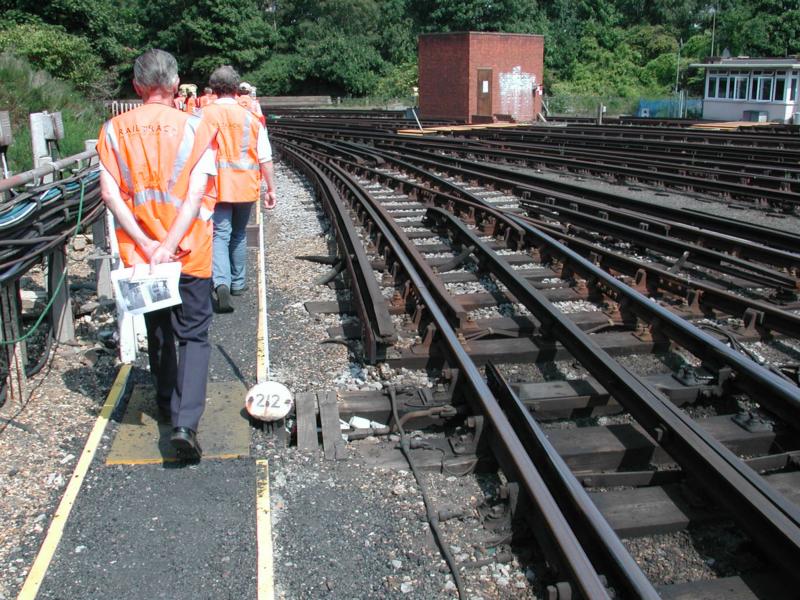
We then walked along the edge of the depot access track back
to Wood Lane station. |

|
As can be seen, many of the depot points are hand-operated.
The points timber is carrying no less than five number plates; nobody
was able to explain these to me in any more detail than "they're for the
computer". |

|
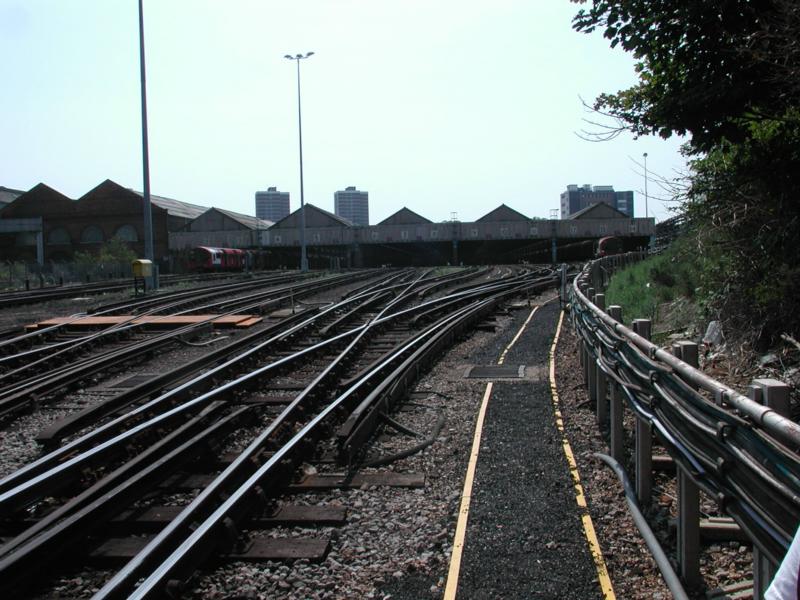
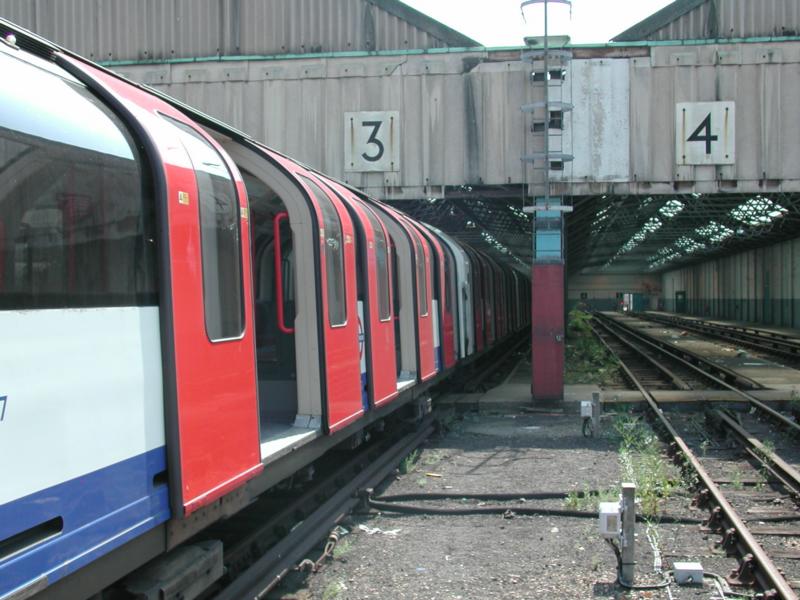
Turning around we get a view of the depot building. The power
was off for the duration of our tour, so the trains you see here didn't move
while we were there. |

|
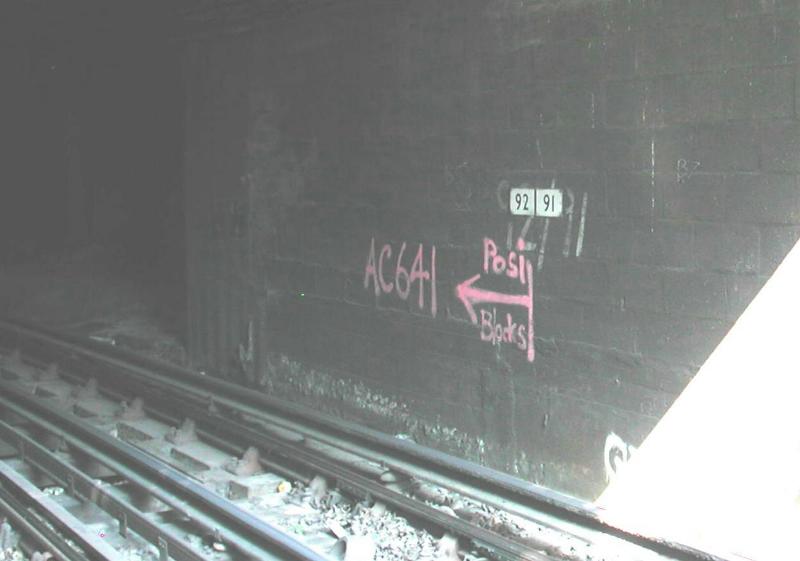
This is the mouth of the tunnel from the depot to White City;
this track is normally used by eastbound trains coming from White City to
stable, though it is bidirectional. The numbers on the wall appear to indicate
some change in status ("posi blocks" presumably has something to do
with the positive rail) but nobody there had an explanation. Between the
negative rail and the left-hand running rail you can see the aerial for the
station-to-train CCTV system. |

|
Almost the whole length of the tunnel from the depot to where
it emerges south of White City is occupied by platform 4 at Wood Lane; while the
station was in use this was the westbound through line towards Acton. Here we
see a station roundel. |

|
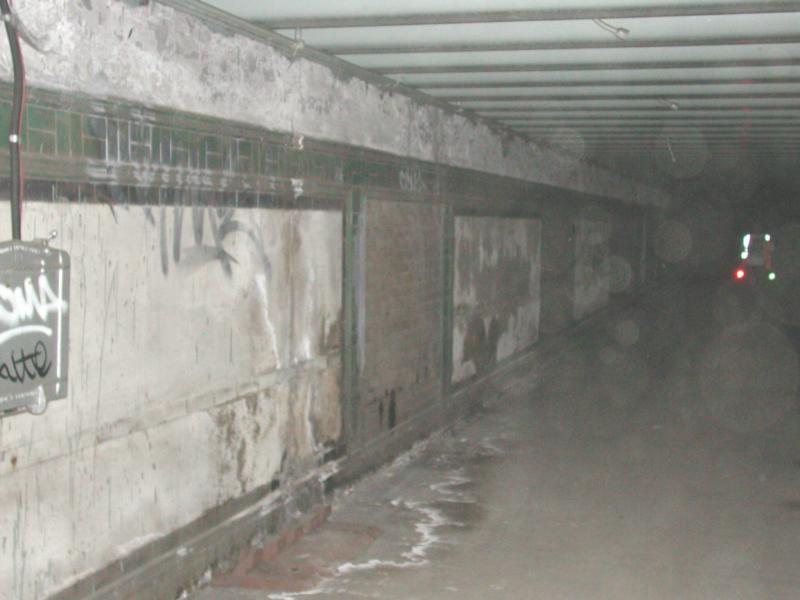
Here we are looking along the station wall; the colour scheme
is just visible. The bright lights at the far end are reflections from someone's
hi-vis jacket. |

|
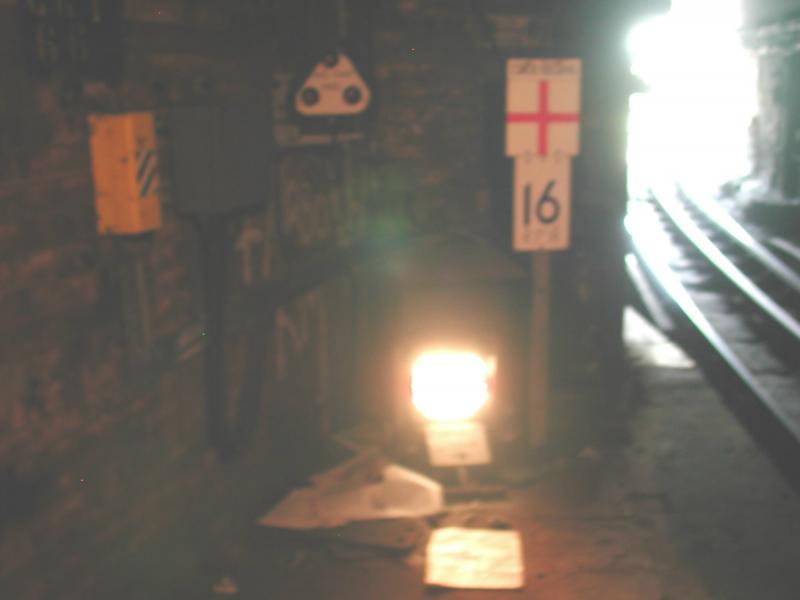
This cluster of signs and signals are at the north end of the
platform, just before it emerges into the open. The yellow and black striped box
on the left is a telephone, while the very bright light at the bottom is the
shunt signal guarding the exit. The white stuff below that is just a pile of
abandoned papers. |

|
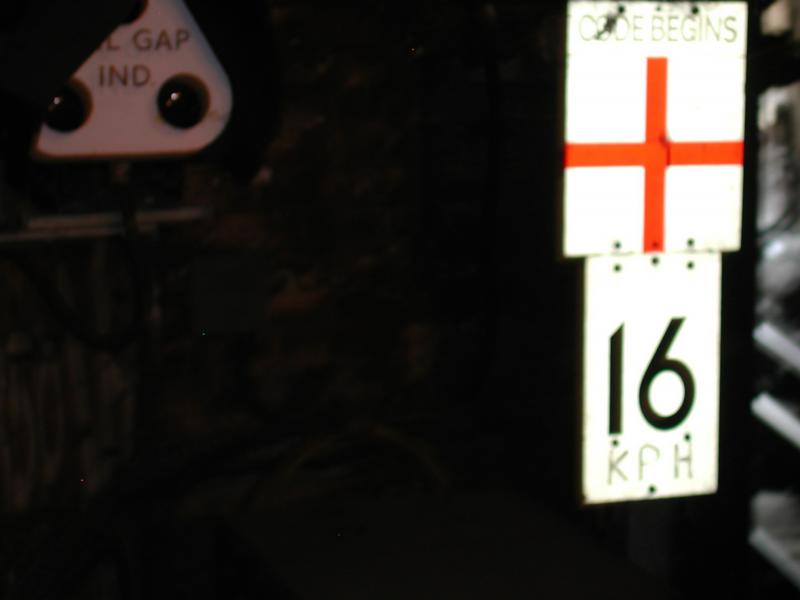
Here we see the various signs more clearly. The red cross, as
it says, is a "code begins" marker - up to this point the driver will
be operating the train purely manually, but from this point on he can switch to
using the signalling codes. As can be seen, the sharp turn into the platform has
a 16kph (10mph) speed limit. On the left is the rail gap indicator. While power
was off in the depot and through Wood Lane station, it was of course switched on
at White City itself. Therefore this indicator is blank. If the traction power
was off then a triangle of small red lights would have switched on. |
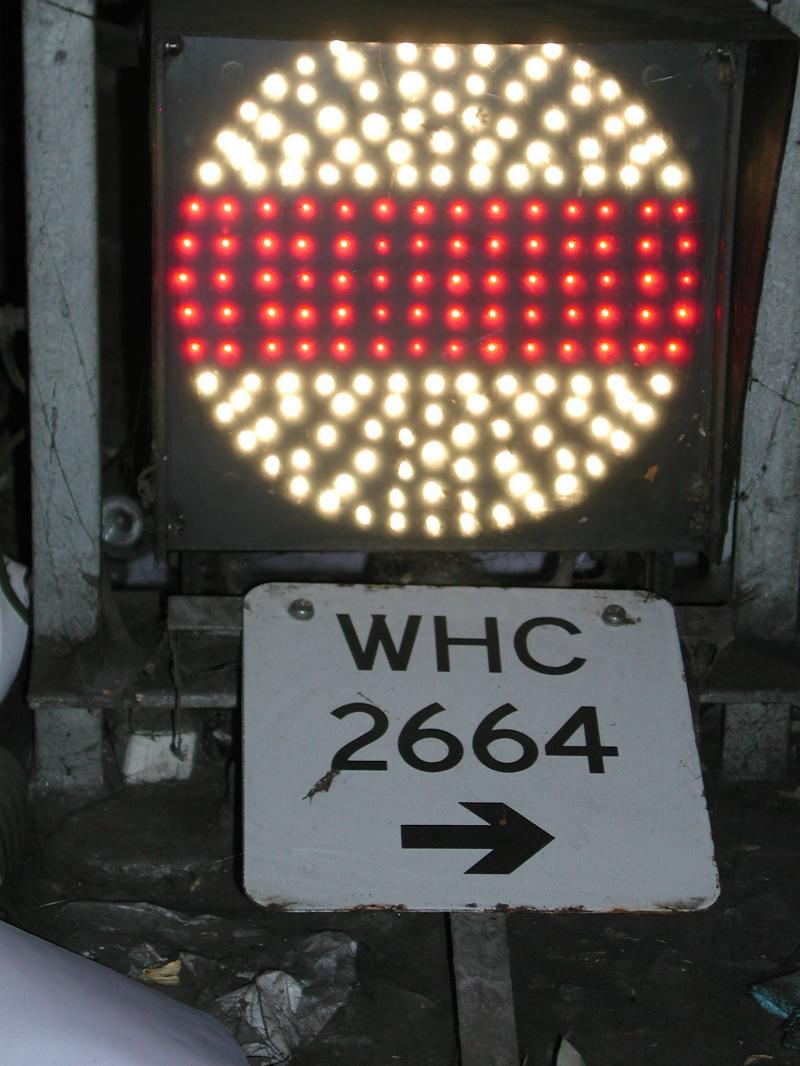
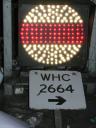 |
This is the shunt signal itself; the arrow means that it
applies to the track on the right. The red bar is horizontal, meaning "stop".
Older signals were a painted metal disc and actually rotated, but all those on
the Central Line are fibre-optic types with the light being carried to the
signal head from a few bulbs. To change aspect to the "clear to shunt"
aspect (with a diagonal red bar), a different set of bulbs are used so that
different points in the matrix are red. |

|
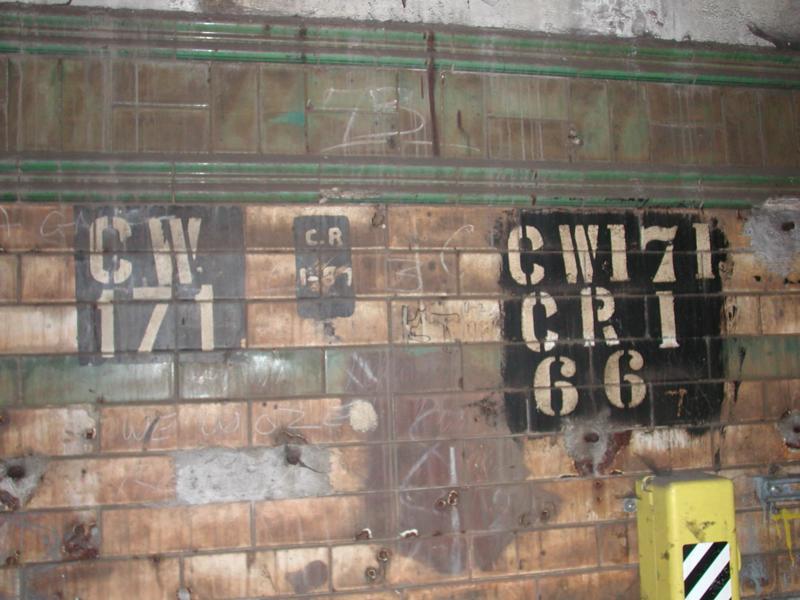
Various official-looking numbers painted on the wall. |
 |
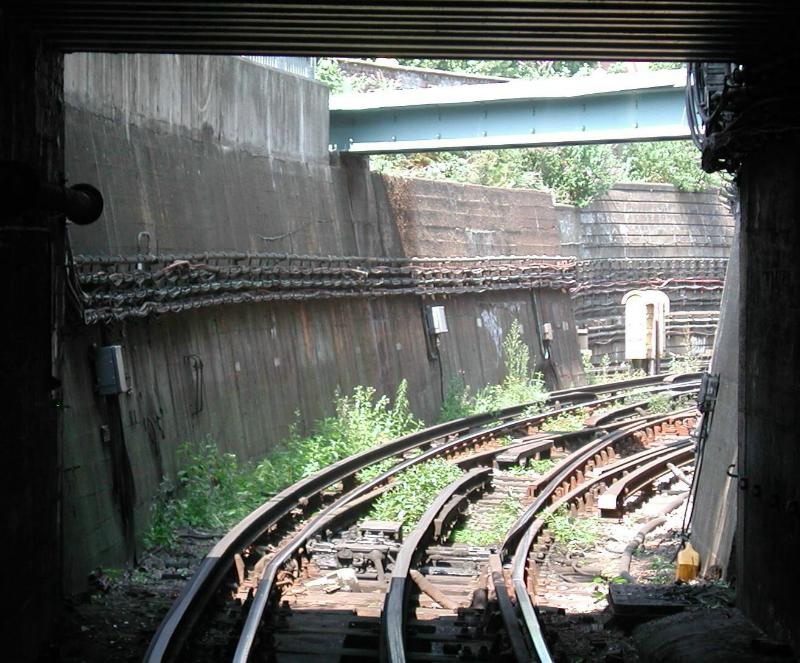
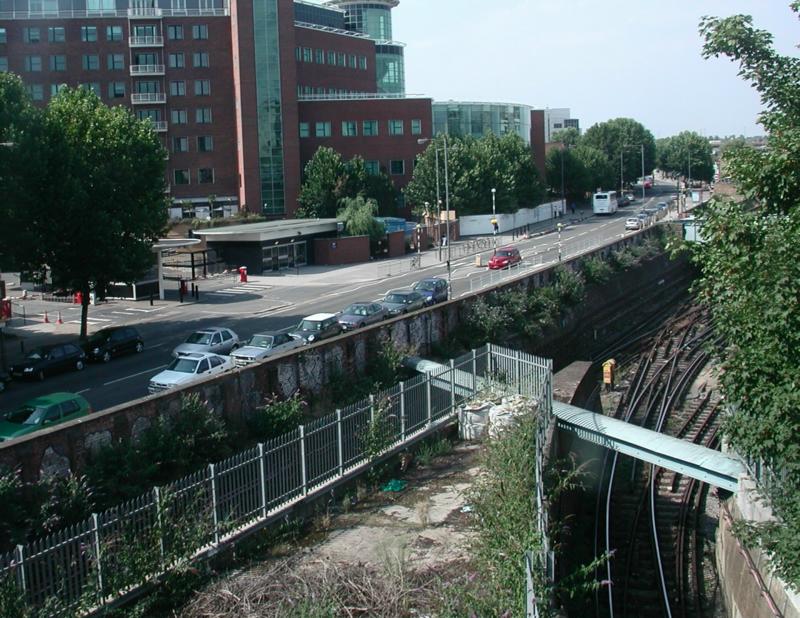
Here we see the line into White City. The curved wall is
visible from the platform at White City (and can be seen in the
first photo on this page, though the points
are hidden). The white boxes are the section switches and show where the gap in
the power rail is, with the line beyond them being live. |
 |
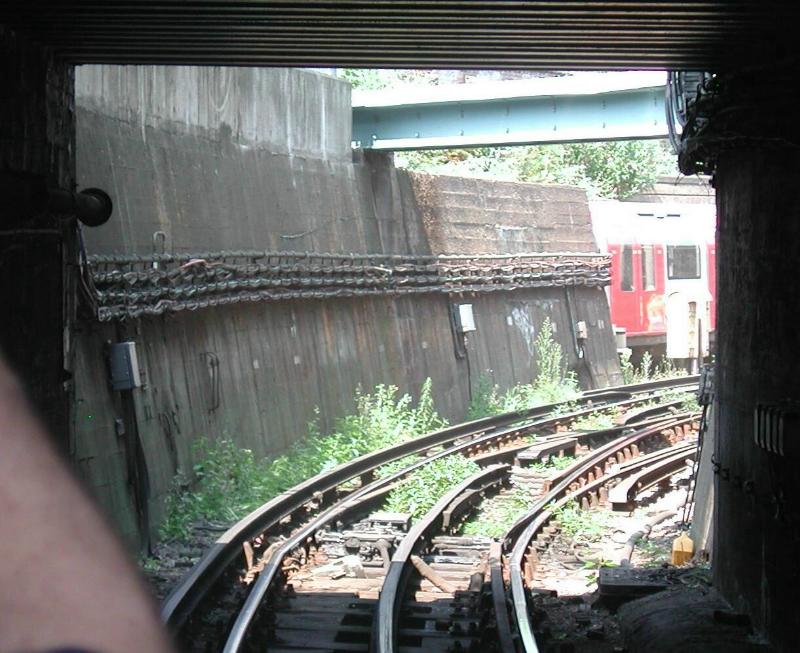
And the same view, but this time with an eastbound service
train passing. |
 |
The Hammersmith & City passes almost directly over the old
Wood Lane station and this shot is taken (later in the day) from a passing
train. Here we see the depot entrance track from above - the previous photos
were taken from almost directly underneath this point. White City station is
hidden behind the tree, and the BBC Television Centre is on the left of the
road. |

|
The view from the south end of the platform towards the depot.
The alcove is, I believe, the original route of the westbound track, with the
present depot entrance route postdating the 1948 rebuild. |

|
Here we see the mouth of the depot exit track, leading to the
westbound platform at White City (it merges with the present westbound track in
tunnel). This track is newer, being built when the depot area was rebuilt in
1948. At the top left of the portal can be seen an old steam whistle. |

|
More mysterious boards around the negative rail. The white
sign to the right of the track reminds drivers to switch radio channels. |

|
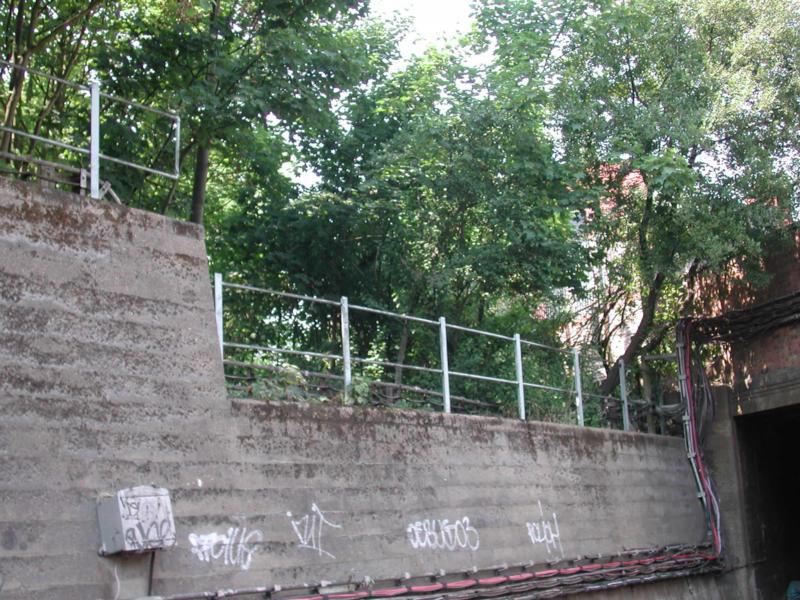
The original Wood Lane station was at ground level and formed
a 180° curve from westbound to eastbound track, with the depot reached by
reversing from the east end or running through the station and taking a sharp
curve at the west end (trains ran through the station from east to west, turning
south to reach the eastbound track). There were platforms on either side
(platform 1 on the inside and platform 2 on the outside). The railings show
where this station was. |

|
A closer view of this location. As best I can judge, the lower
section would be where a track climbed up from the westbound tunnel to the
station, while the depot exit track ran along behind the higher railings. The
present access tracks would not have been there. |

|
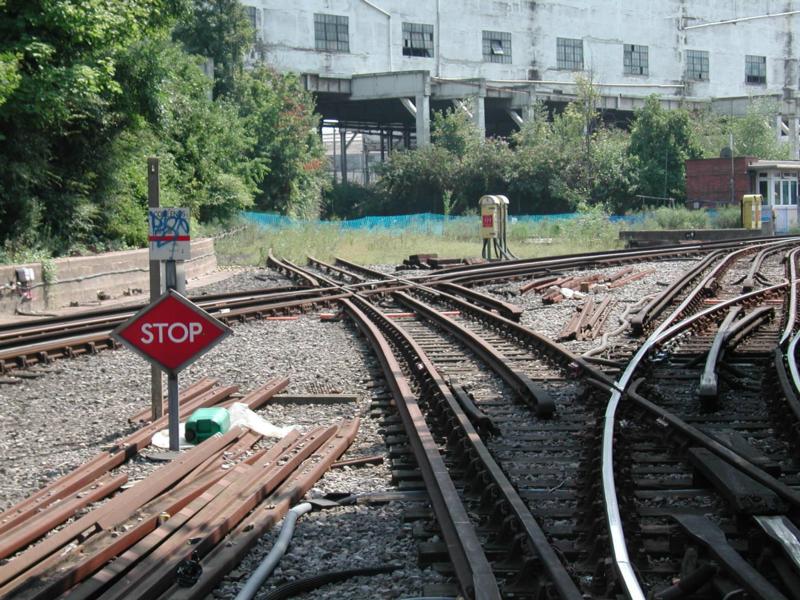
Here we see the depot mouth. The white building in the
distance was originally a (very ornate) walkway from Shepherd's Bush Green to
the White City Exhibition Centre. The horizontal red bar is an "end of code"
notice, telling drivers that they must operate in Restricted Manual from this
point on. Any driver ignoring the "STOP" notice when on the left-hand
branch would be in for a shock ... |
 |
... because this is where he would end up. |
 |
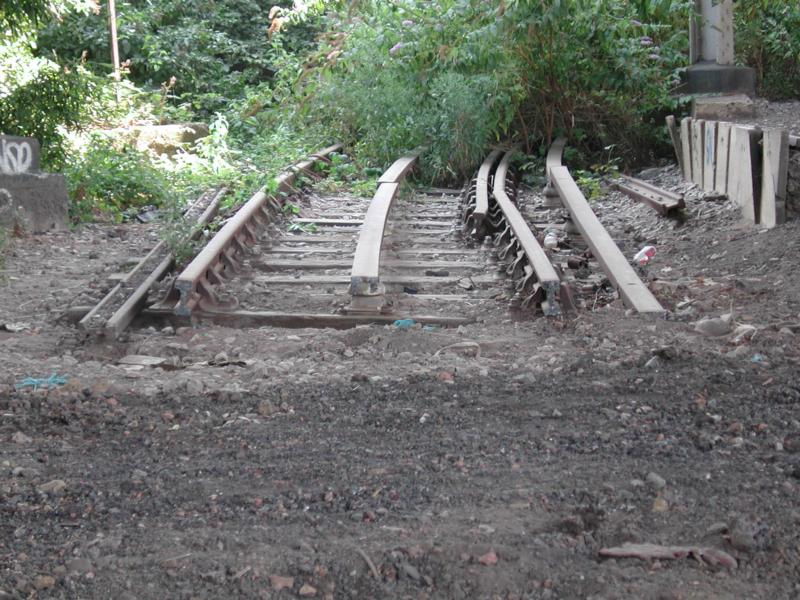
A closer view of the track end. Note that the current rails
are not the normal type sitting in a bracket; rather, they are an
inverted U shape sitting on top of a projection on the insulator. |
 |
If you could get over the gap, this is the track continuing.
This line originally ran in a huge loop around the south end of the entire
depot, ending up about where the photographs of the power station were taken. |
 |
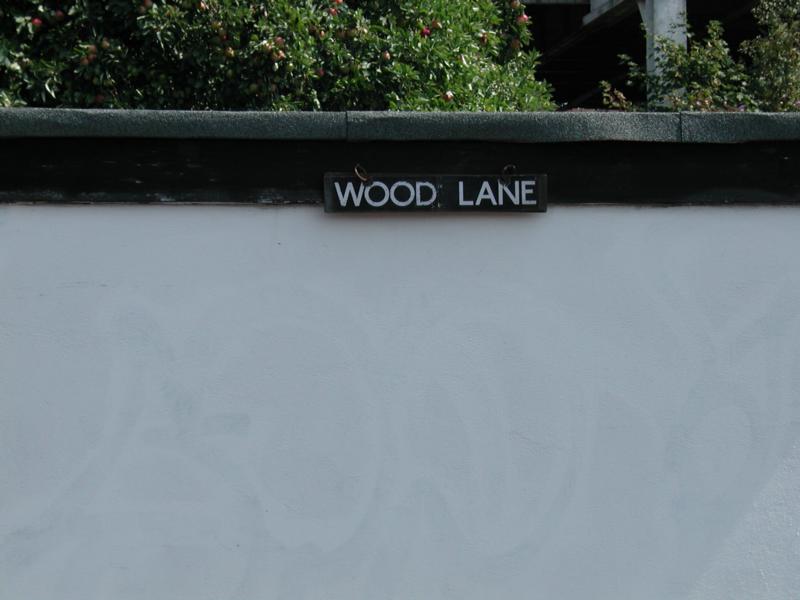
Just to prove we are at Wood Lane. |
 |
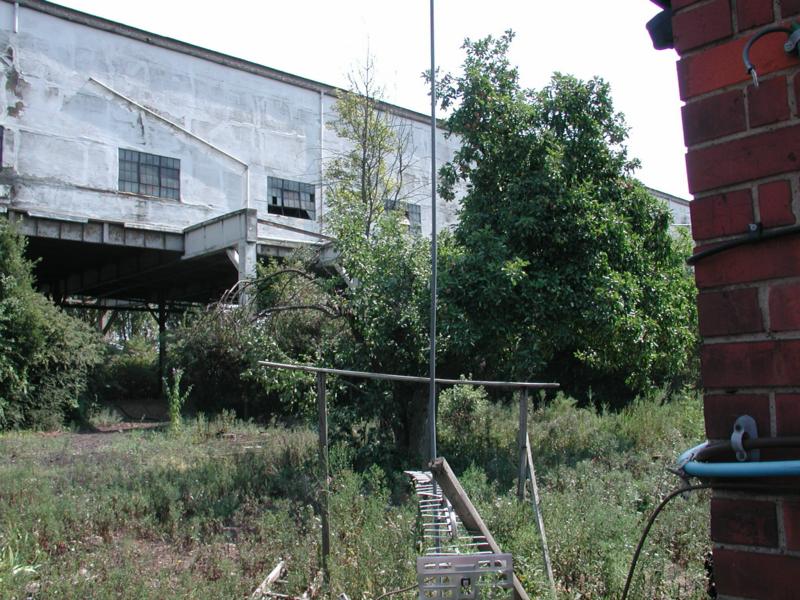
This tree ought to provide enough apples for a few drivers'
lunchboxes. Another section of the walkway is visible behind; this building is
going to be demolished before it can fall through the tunnel roof. |

|
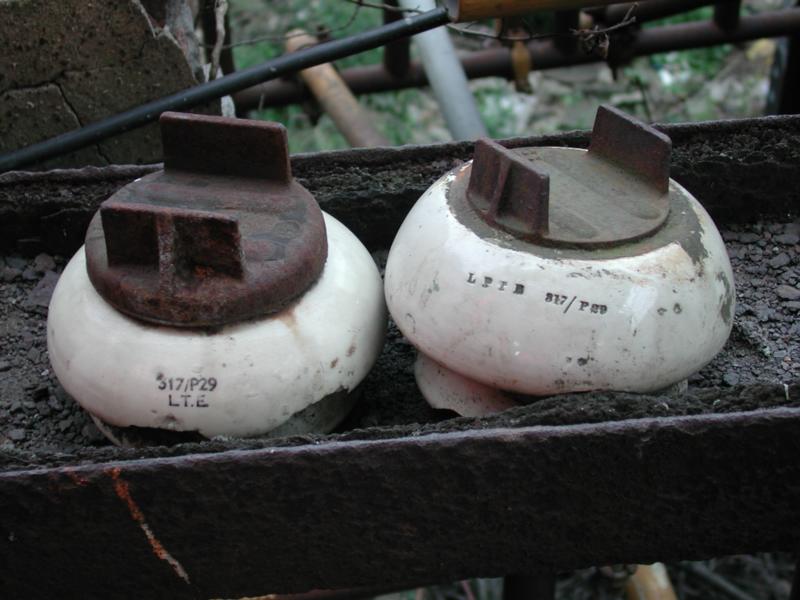
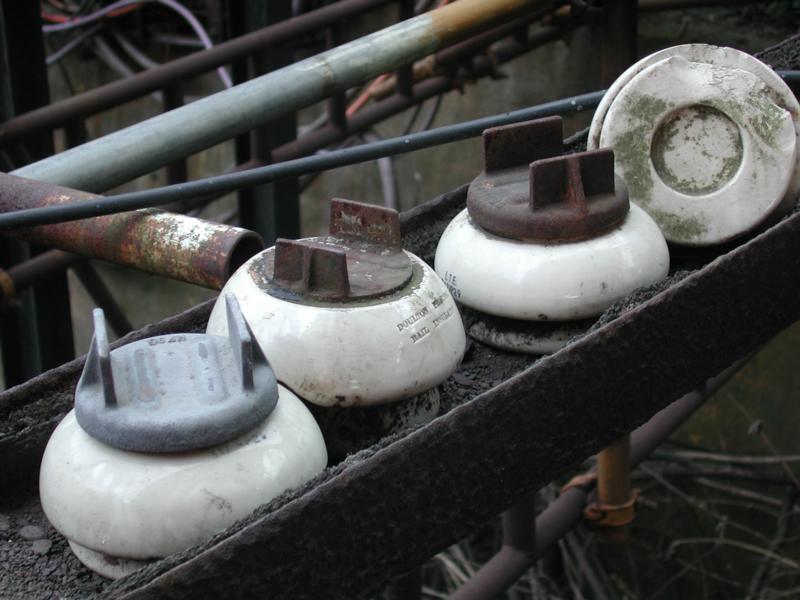
Some old current rail insulators lying around. |

|
More of the same. |
 |
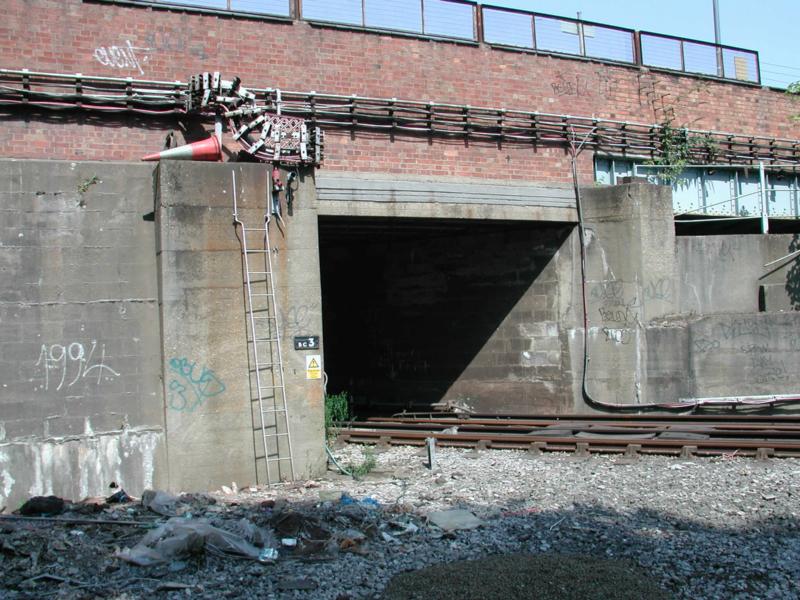
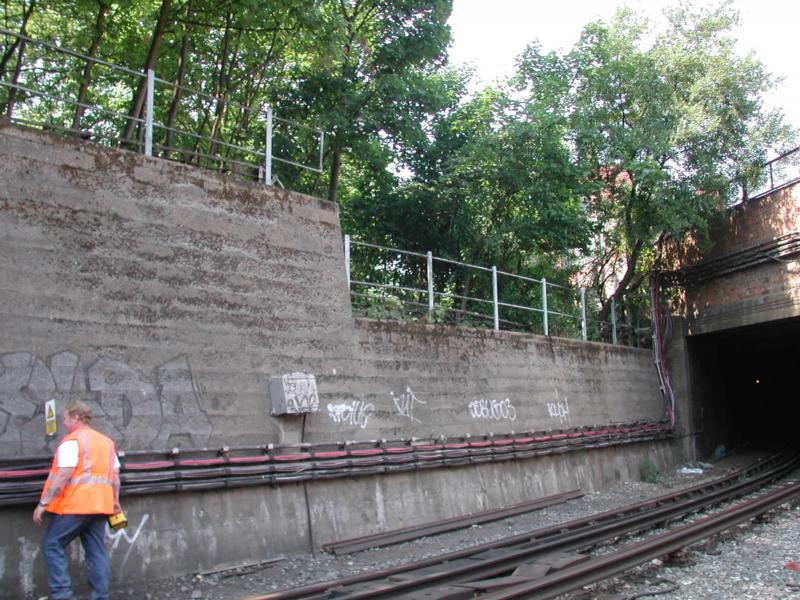
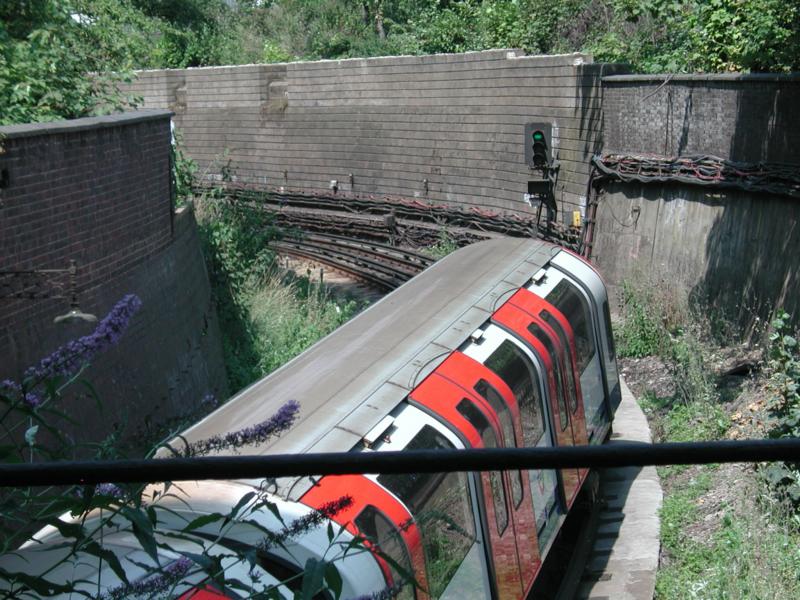
The Central Line always emerged at this portal, even when this
was merely the access to the depot and carried no passengers. However, the track
used to climb and twist left to reach the depot level. Note the old-fashioned
lamp hanging from the left hand cutting wall. In 1948 a new section of tunnel
was dug to take the westbound line east of the Wood Lane area and into White
City station well to the side of the existing tracks, allowing room for a new
depot exit track (which merges with it in the new tunnel) and a redesign of the
depot throat. So westbound trains now emerge briefly into the light before
diving underground for a short distance approaching the station. |
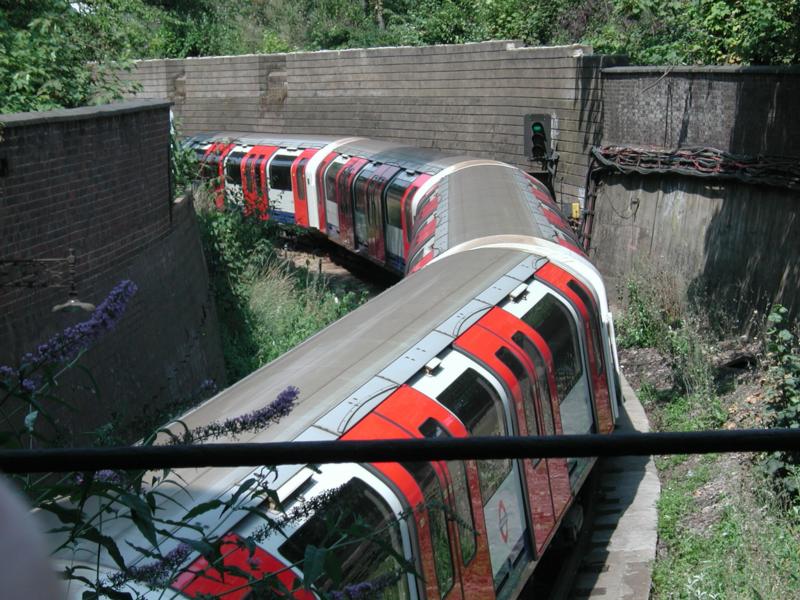
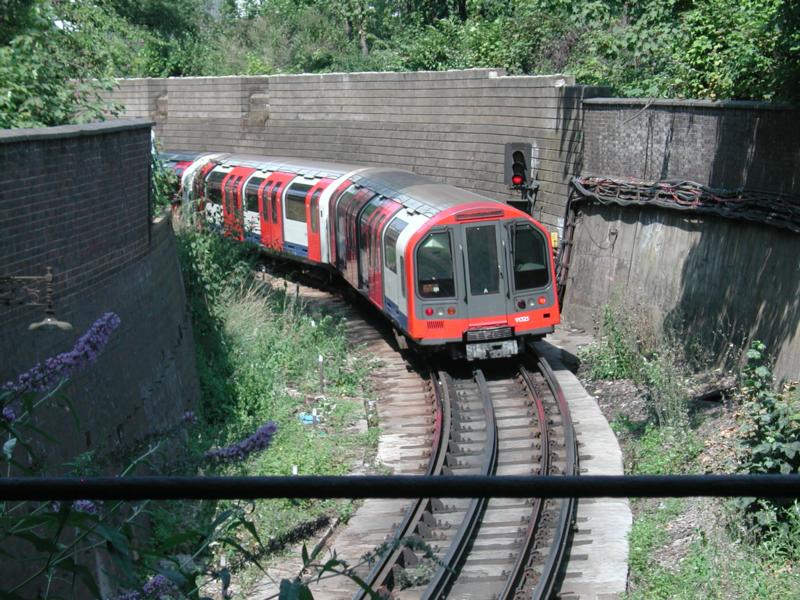
| These pictures show a train passing through this
section: |
 |
 |
 |
 |
 |
| 13:25:34 |
13:25:41 |
13:26:02 |
13:26:07 |
13:26:17 |
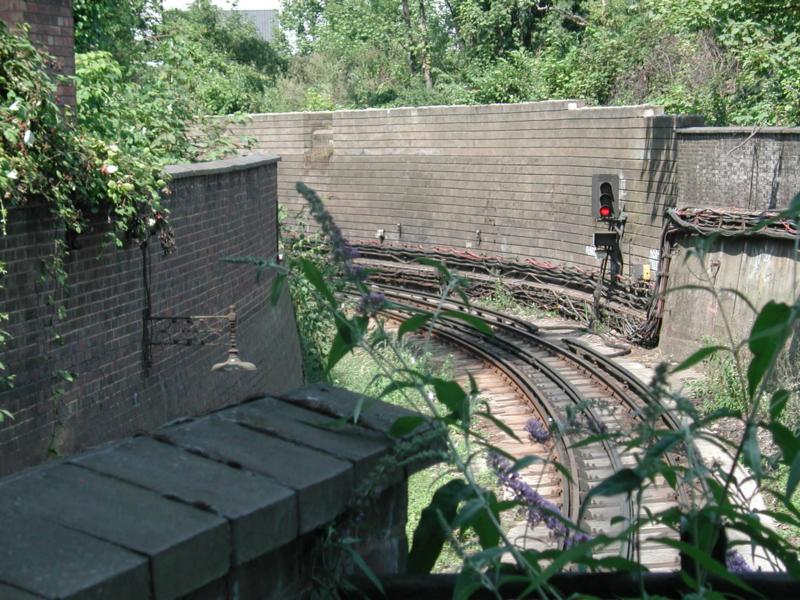
| The route has been set and codes are available
to White City station, but not all the way to the starter signal. |
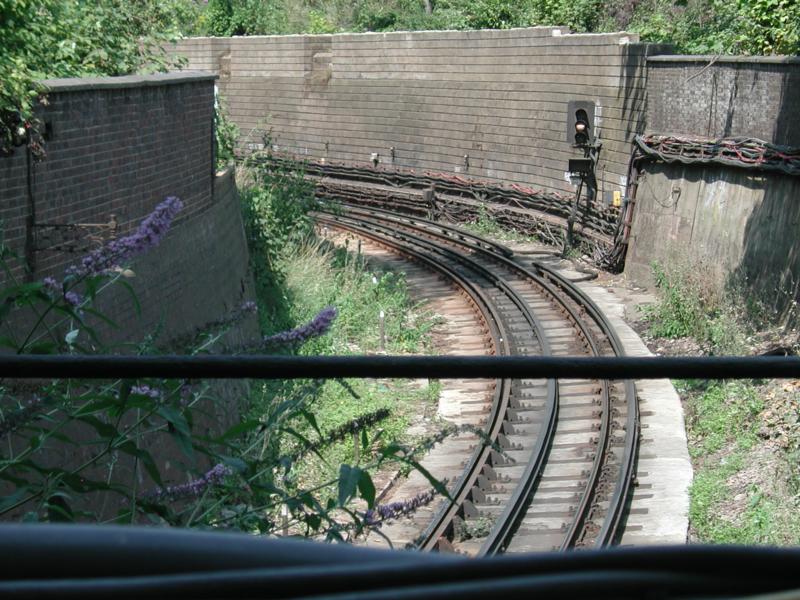
Now the previous train has moved far enough
that the line is clear to the next signal. |
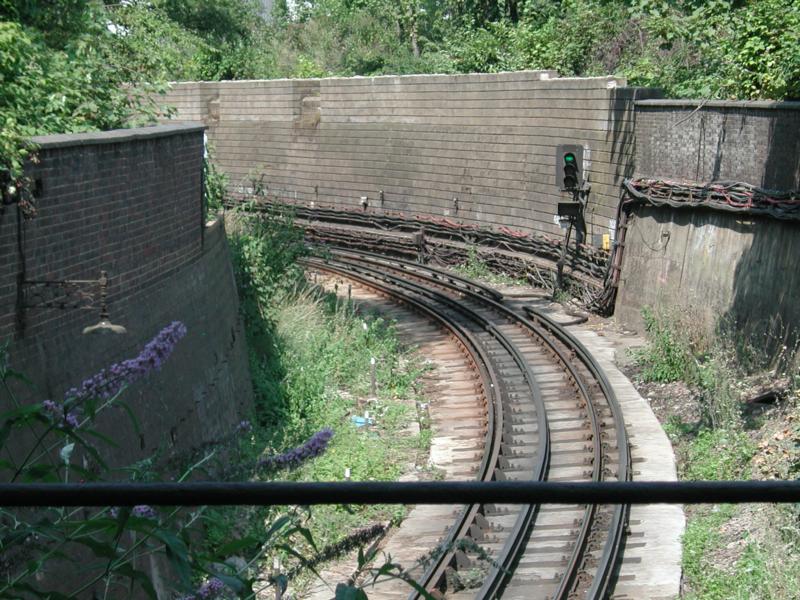
Here's the train. |
Clearly the track-circuit boundary is not at
the signal. |
But now we've reached it and the signal drops
to red. | |

|
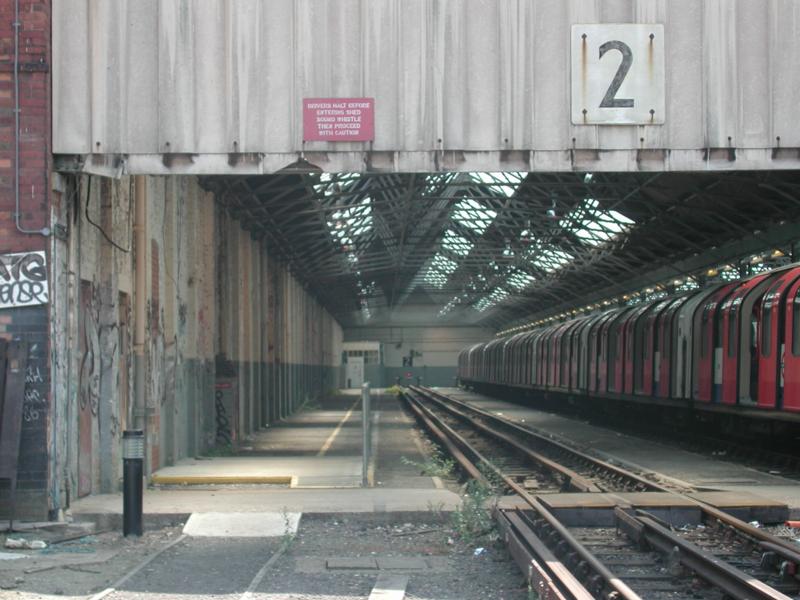
The left-hand (east) end of the depot building. The sign reads
Drivers halt before entering shed sound whistle then proceed with caution. |

|
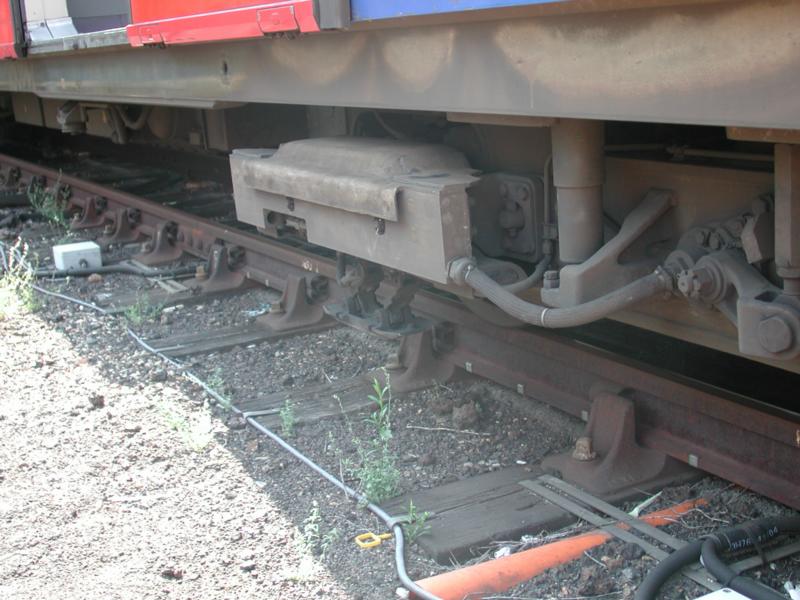
The positive shoegear of the train on track 3. Central Line
trains are fitted with "high lift" shoegear because the positive rail
is higher than usual between Shepherd's Bush and Liverpool Street. From the
looks of this photograph the shoes are mounted on two parallel links that allow
it to swing up and back or be pushed (by springs, presumably) down and forward. |

|
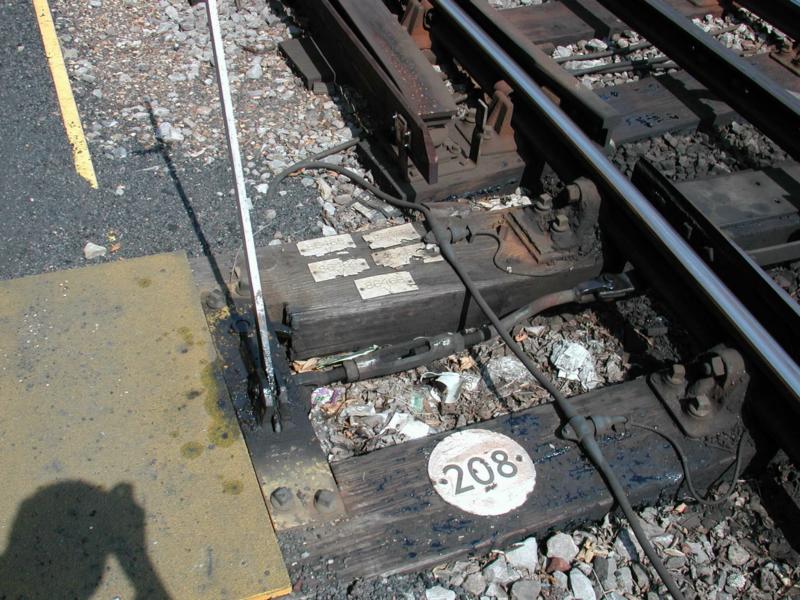
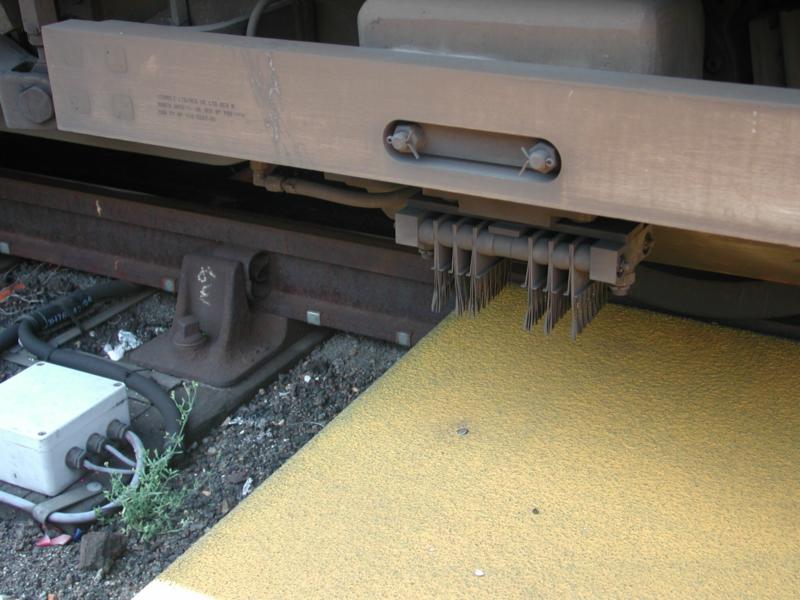
Sleet brushes to remove snow and sleet from the current rail.
The white box by the track appears to drive the signalling codes loop. These
loops are used to test the on-board equipment rather than to signal the trains. |

|
Another view of the depot. We can see the signalling relays
(on small posts) connected to the signalling codes loop driver boxes. |

|
The open tracks on the west side of the depot. |

|
Ordinary current rail; compare with the Central London's
inverted-U shape. |

|
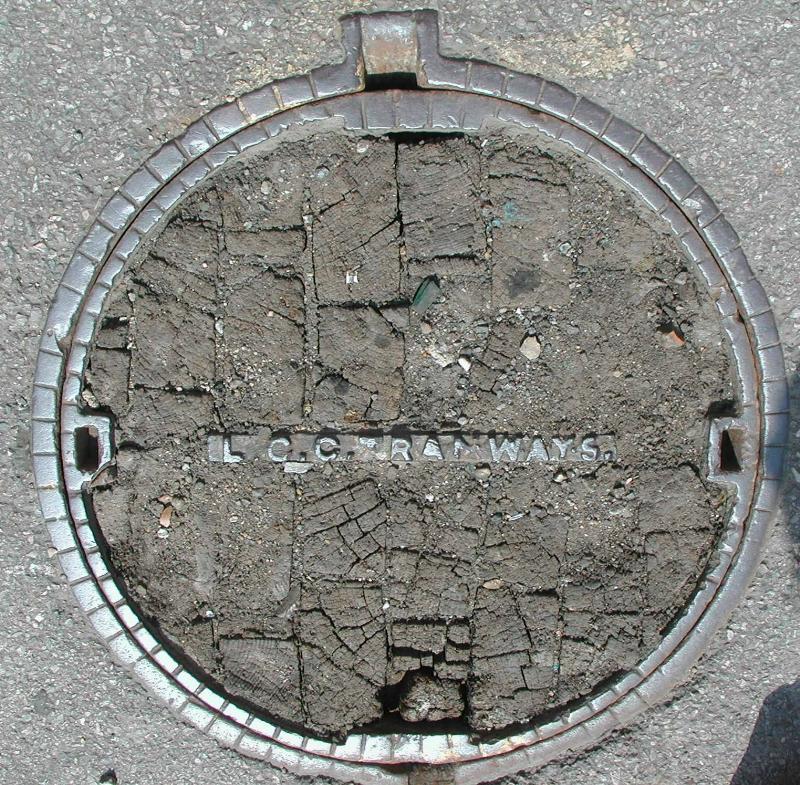
As can be seen, the power station was later used to supply the
London County Council trams. |

|
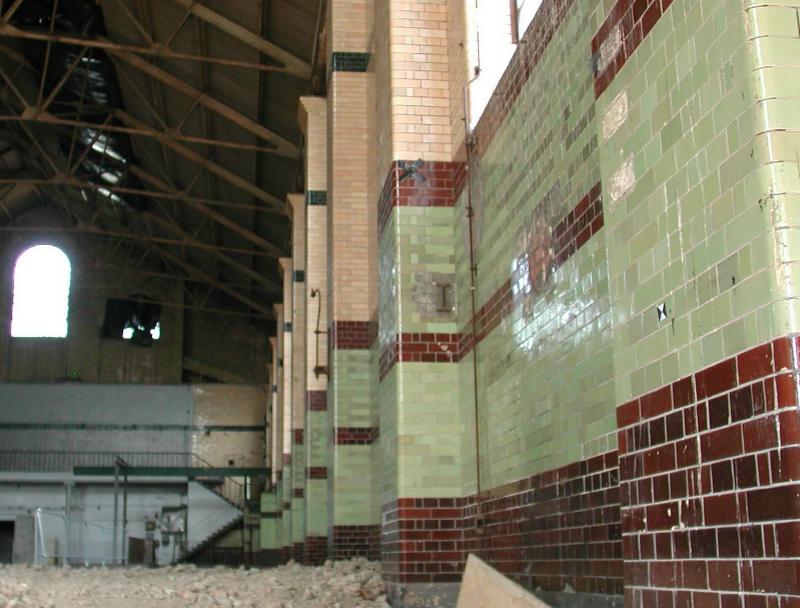
A look inside the power house at the beautiful tiling. |

|
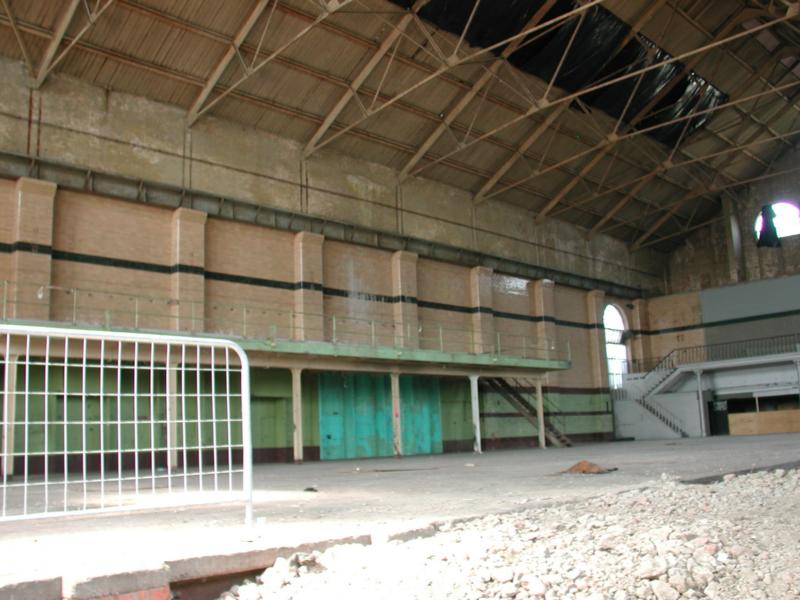
Roger Rabbit Was Framed Here. We look across the width of the
power house; this is where the denoument of Who Framed Roger Rabbit? was
filmed. |
 |
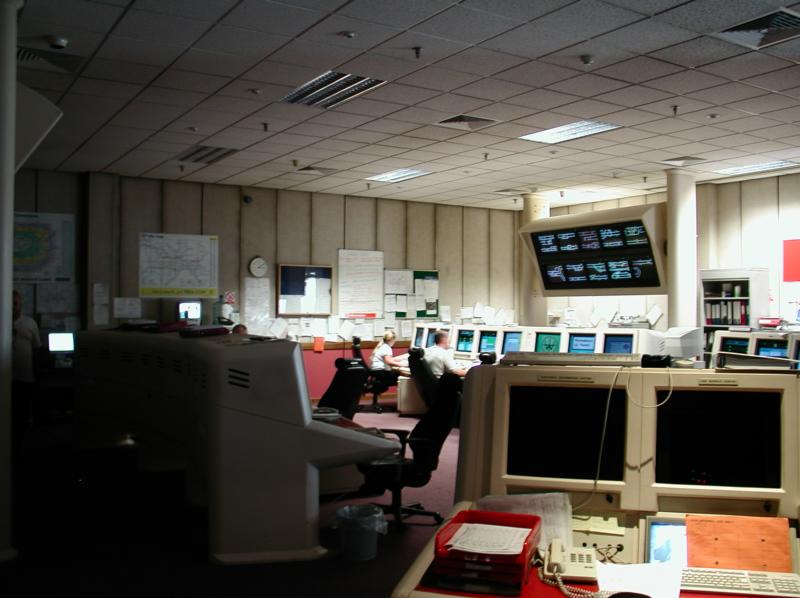
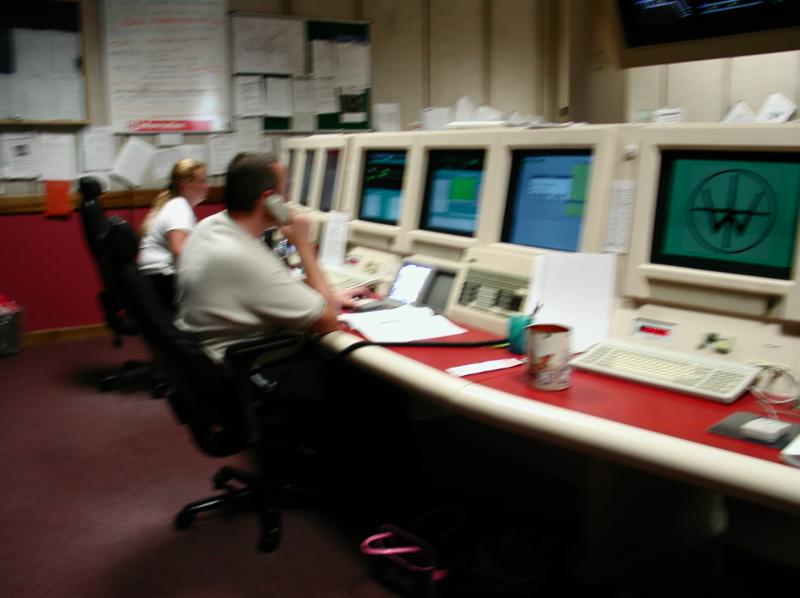
After the depot visit we walked to the Wood Lane Control Centre, which runs
the entire Central Line. Here we see (almost) the entire control room from one
corner. Visible are two of the six Service Duty Managers (meal breaks were in
progress at the time this was taken) - the lady on the left is running the
western part of the line and the man next to her the rest of it. Not visible at
the far end of the consoles on the left hand side of the picture is the Duty
Line Control Manager, who is working the radio to the drivers. |

|
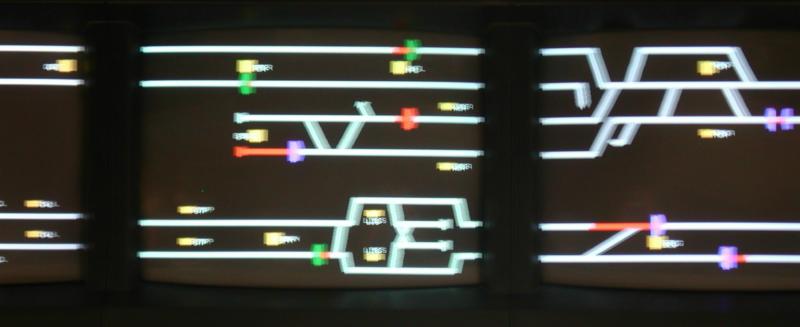
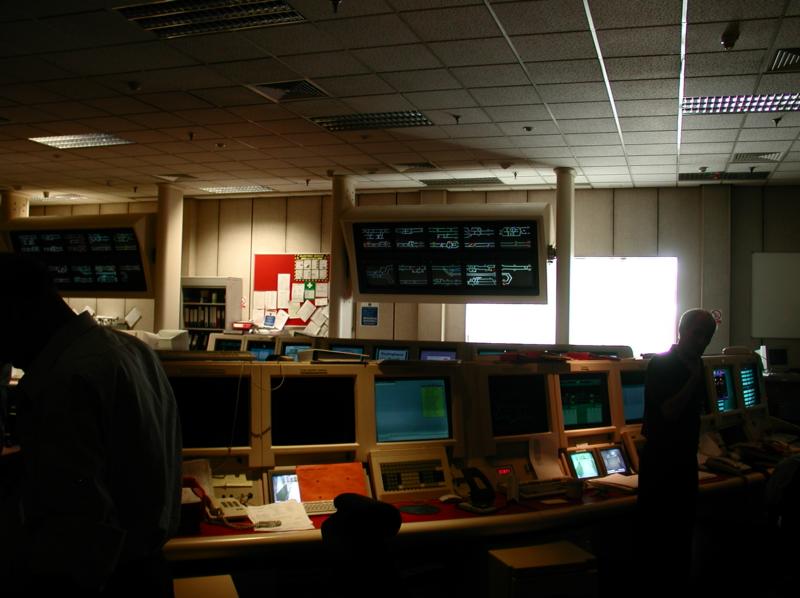
Hanging from the ceiling in various places are these overview
diagrams, showing the entire line and the location of every train.The line is
broken into three parts. Starting at the top left is West Ruislip and the depot;
Ealing Broadway then appears on the middle screen and the two branches converge
on the next screen at North Acton. Finally, at top right we can see White City,
with its right-hand running and central platform. The lower part of the top row
shows the central tunnel section. At the extreme left end is Holland Park and
at the extreme right Leyton. Between them can be seen the reversing sidings at
Marble Arch and British Museum (just west of Holborn) together with the two
sidings at Liverpool Street. Finally, the bottom row of screens shows
Leytonstone to Epping and the Hainault Loop. |
 and closeup: and closeup:
 |
Here we see the third and fourth screens of the top row
(slightly blurred). The former shows Ealing Broadway above Liverpool Street, and
the latter North Acton. The yellow rectangles show the platforms (for example,
if a train has a door fault on one side it can be useful to know which side the
platform is on) and the three letter codes for each station (e.g. PER
for Perivale or LIS for Liverpool Street). Each train is shown by a
short red section (the length is based on the track circuits and diagrammatic
convenience) with a coloured "hammerhead" at the front. The colour of
the latter shows the destination: green for West Ruislip and Epping, blue for
Hainault and Ealing Broadway, and red and yellow for intermediate destinations
(I don't have a full list). |
 and closeup: and closeup:
 |
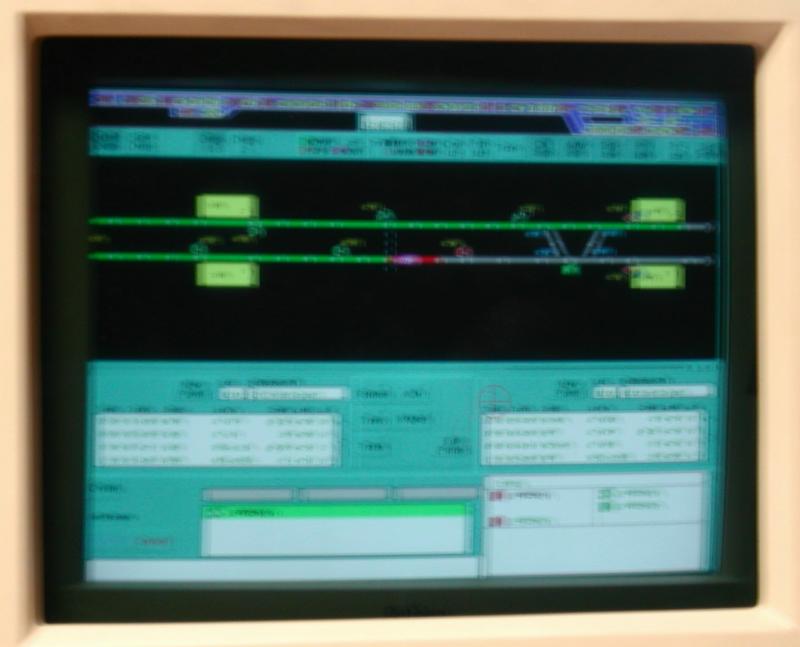
Each manager has detailed screens allowing them to see what
trains are in their area and control them in various ways. Our guide took
control of the Epping area to demonstrate. In the middle of the screen are the
tracks approaching Epping. Grey indicates track not in use, white (not happening
here) indicates a route has been set and green that signalling codes are present
on that section. Red shows a train is occupying the track circuit, with the
train number in purple. The little triangles show the signals, coloured (red,
white, or green) to show their current aspect; the yellow numbers next to them
are the signal numbers (the blue numbers near Epping are points numbers, and the
green rectangle there is something to do with a shunt signal). At the very top
of the screen is a summary diagram of the line; the purple areas appear to
correspond to locations where there is pointwork, so these are probably status
indicators for the remote interlockings. The bottom half of the screen is used
for controlling train schedules. Normally the line works from a timetable
preprogrammed into the system, but if a train has to be diverted to a new
destination or otherwise rescheduled, the changes have to be entered - the
computer system will then set routes as the train reaches the relevant
locations. The manager can also set routes by hand or even move individual sets
of points. |

|
Here we see the two managers at work. The line was suffering
badly from speed restrictions due to high rail temperatures, so trains were
being constantly rescheduled. About the time that we finished, they finally gave
up and implemented an emergency timetable. |

|
One final overview of the control room. |

|
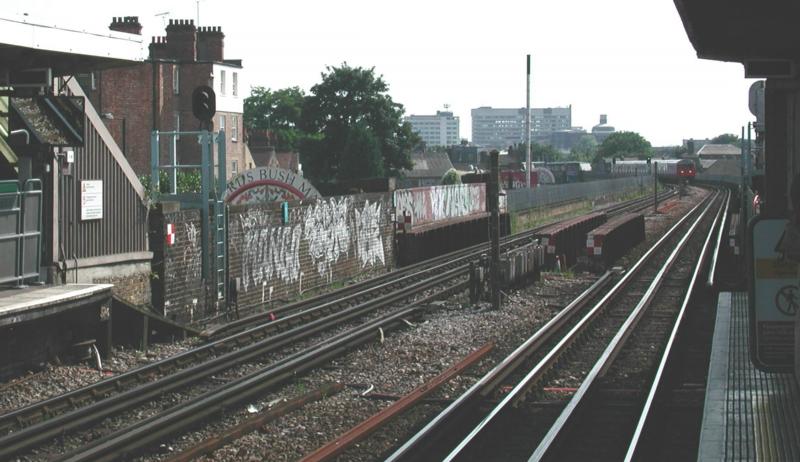
On the way home; a C stock train is approaching Shepherd's
Bush (Hammersmith & City Line) station on the eastbound track. At this point
"Underground" really isn't the right name! |

|
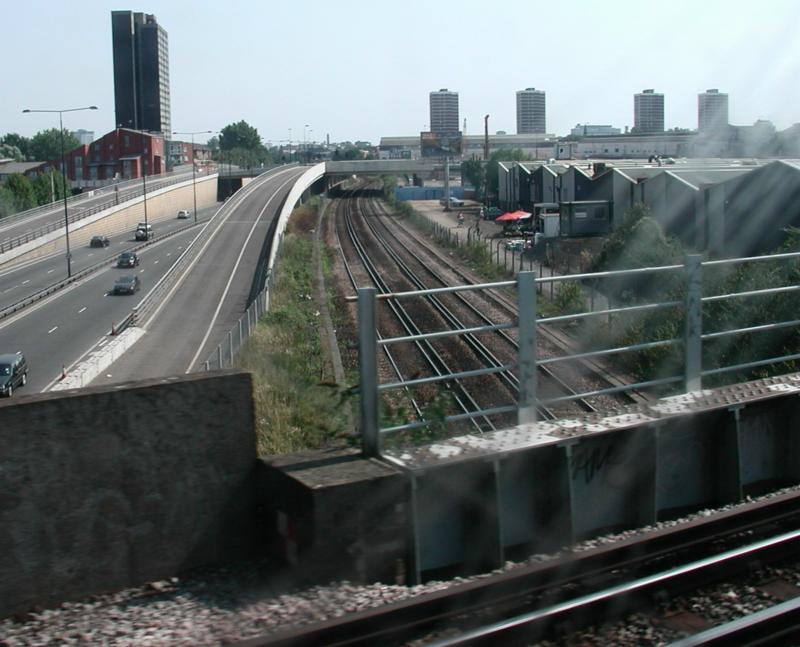
A view southwards over the West London Line. The Middle Circle
used to come down a ramp from the H&C to meet this line somewhere under the
present on-ramp. Facing the other way it would have been possible to see the
place where the Ealing & Shepherd's Bush Railway branched off the West
London Line; the Central runs over the E&SBR from a point between White City
and East Acton. |


 and closeup:
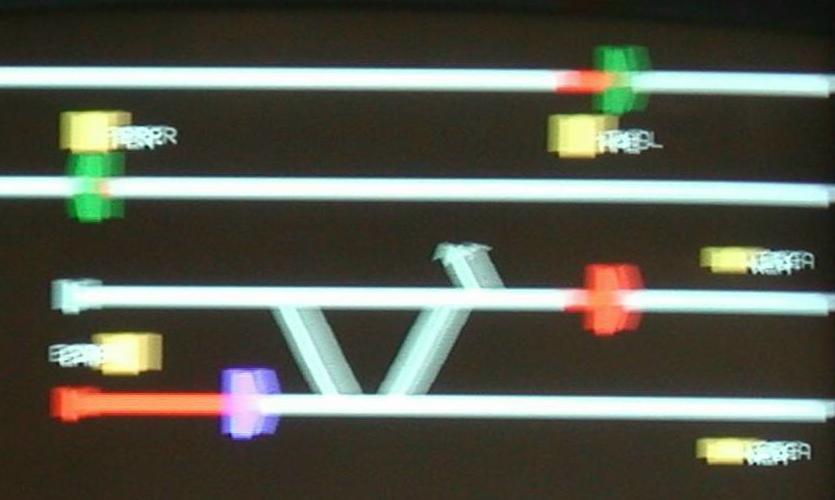
 and closeup:
 Back to the
rail photos index.
Back to the
rail photos index. Back
to Clive's home page.
Back
to Clive's home page.